
The Left Hand
The question now arises: can we derive uniform and pedagogically useful principles for left-hand technique—drawn from both the instrument’s nature and our body’s structure—in a similar way as we have for the bow arm?
The answer is definitively yes. We will first examine this problem from a physiological perspective before turning to the practical aspects of playing.
The left hand serves a dual purpose: it must shorten the string to achieve specific pitches while simultaneously enlivening and animating the sound through vibrato.
Pressing down the string
requires considerable force from both hand and arm. The principle of economical force application governs fingering and position changes alike. It is crucial to understand that muscular work should never exceed what the string’s tension and necessary mechanical resistance demand.
The cello’s static and dynamic conditions differ so markedly from those of violin and piano that we can rarely—and then only with great caution and in isolated cases—draw analogies to those instruments’ techniques.
Above all, developing a refined sense of movement proves indispensable, since we have fewer reference points for finger orientation compared to violin and piano. The violinist literally holds their instrument “in hand,” and when ascending to higher positions, the eye reliably guides the hand. On cello, however, the hand moves only partially within the visual field. When sliding into lower positions, it disappears from sight entirely. In the highest positions, visual control becomes inadequate due to the considerable distance and ever-decreasing spatial intervals. Here we must rely primarily on our sense of movement and position.
Another significant difference from violin emerges from the much greater distances each finger must traverse. The hand must spread considerably wider and naturally requires more strength, making its physiological functions quite distinct.
Accuracy—particularly when playing notes that lie far apart—places substantial demands not only on the fingers but also on the left forearm and upper arm, whose various positions must bridge the fingerboard’s distances.
For instance, when a cellist practices octave leaps in sixths, after repeatedly reaching too low or too high, they will gradually develop the correct sense of distance.
(It is interesting to observe that players with some physical or psychological inhibitions often overshoot shifts of ascending intervals on the fingerboard,[1] because the tension required to aim for the note sets in too quickly.)
Correct finger movements and shifting depend closely on the integrity of our positional sense—beyond mere visual cues—which stems from the function of deep sensory nerves within our tissues and organs, including muscles, tendon sheaths, and joints. The immediate contact between skin and string naturally contributes to our spatial orientation as well. During movement, muscular tension transmits information through the central nervous system, simultaneously creating awareness of our limbs’ spatial location and enabling precise movement control through muscular antagonism.[2]
This explains how practice can transform uncertain, tentative movements—marked by excessive force—into automatic, coordinated actions that balance both power and range of motion over time.
The instrumentalist must develop a certain degree of automatism in their playing movements, much as every person naturally develops when learning to walk and run. This automatism should encompass all mechanical tasks that, despite constantly changing musical demands, form technique’s consistent foundation. As movements initially governed by intense conscious control gradually evolve into automatic playing processes, technical security emerges.
Only at this level can players successfully divide their attention, maintaining awareness for the intellectual comprehension and artistic shaping of the musical work.
To accelerate this development—and indeed to achieve this goal at all—following the left-hand principles discussed here proves essential.
A musician’s education must begin with studying fundamental elements, establishing solid foundations. Without this groundwork, players face the burden of relearning corresponding movement mechanics for each new piece. To achieve accuracy, we must primarily cultivate positional awareness—learning to gauge distance rather than relying on conscious perception of arm tension. Under no circumstances should we use muscular tension as our measure for correct movement range, as this risks creating generally excessive tension throughout the system. Moreover, highly tensed muscles inhibit rather than facilitate movement. When the hand simply glides across the strings, no muscular tension exists; tension typically emerges only when we place fingers on the strings—an action requiring specific force—often manifesting in the upper arm, shoulder, or back of the hand, thereby constraining our freedom of movement.
Therefore, when practicing widely spaced positions on the strings, we should keep the goal of the movement in mind. We should learn to estimate, but also try to eliminate as much as we can, any noticeable tension in the arm. Only then is it possible to achieve greater confidence on the fingerboard.
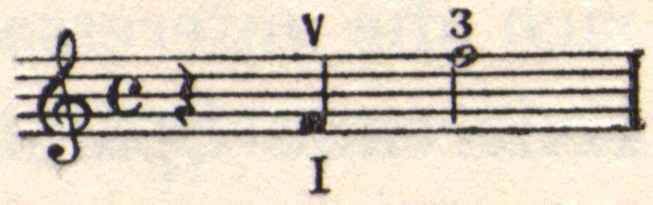
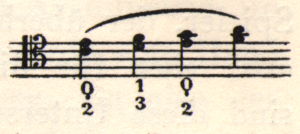
In this example, do not move with just the third finger along, but shift the whole hand into the higher position! This provides security!
Musicians lacking technical refinement often employ—whether consciously or unconsciously—a kind of mechanical memory aid: an audible slide during position changes, particularly in large shifts. This distasteful habit must not be confused with portamento, which serves expressive purposes and carries aesthetic justification. Student players, whose kinesthetic sense remains underdeveloped, should guard against involuntary portamenti.
The principle of holding the first note for its complete duration without delaying the subsequent note’s onset will greatly enhance success in this area. Only through this approach can we develop genuine confidence across the fingerboard. Practicing in any other way inevitably leads to crude, careless technique.
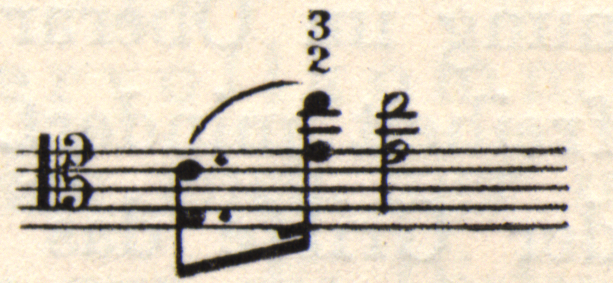
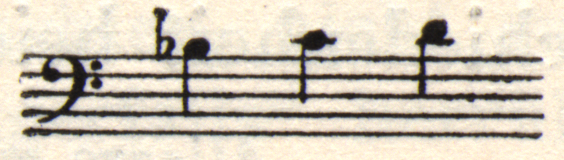
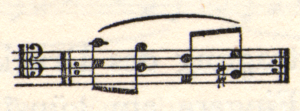
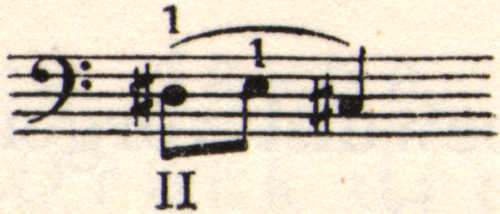
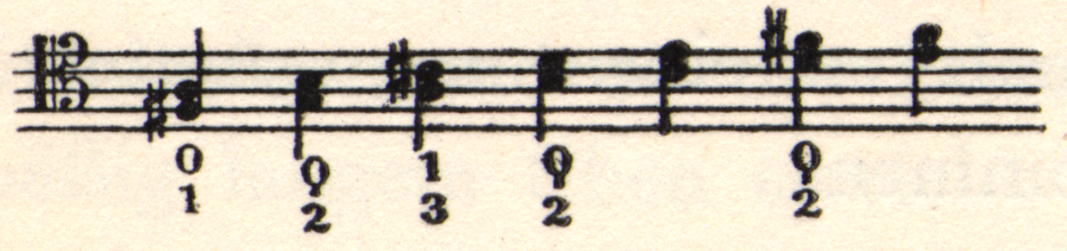
The following octave leaps from the half, first, and second positions should be executed as follows:

The hand maintains its closed configuration across all four cases. Differences in executing various high notes stem primarily from the hand’s varying curvature and the corresponding flexion or extension of the third finger. The palm should consistently contact the same point along the instrument’s edge, providing stable support. As the stretch increases, the hand’s arch flattens correspondingly, while the thumb—which must never abandon the cello’s neck—moves progressively outward. The time needed for position changes should be “borrowed” from the preceding lower note and minimized. (The bow changes occurs at the moment the left hand begins to move.)
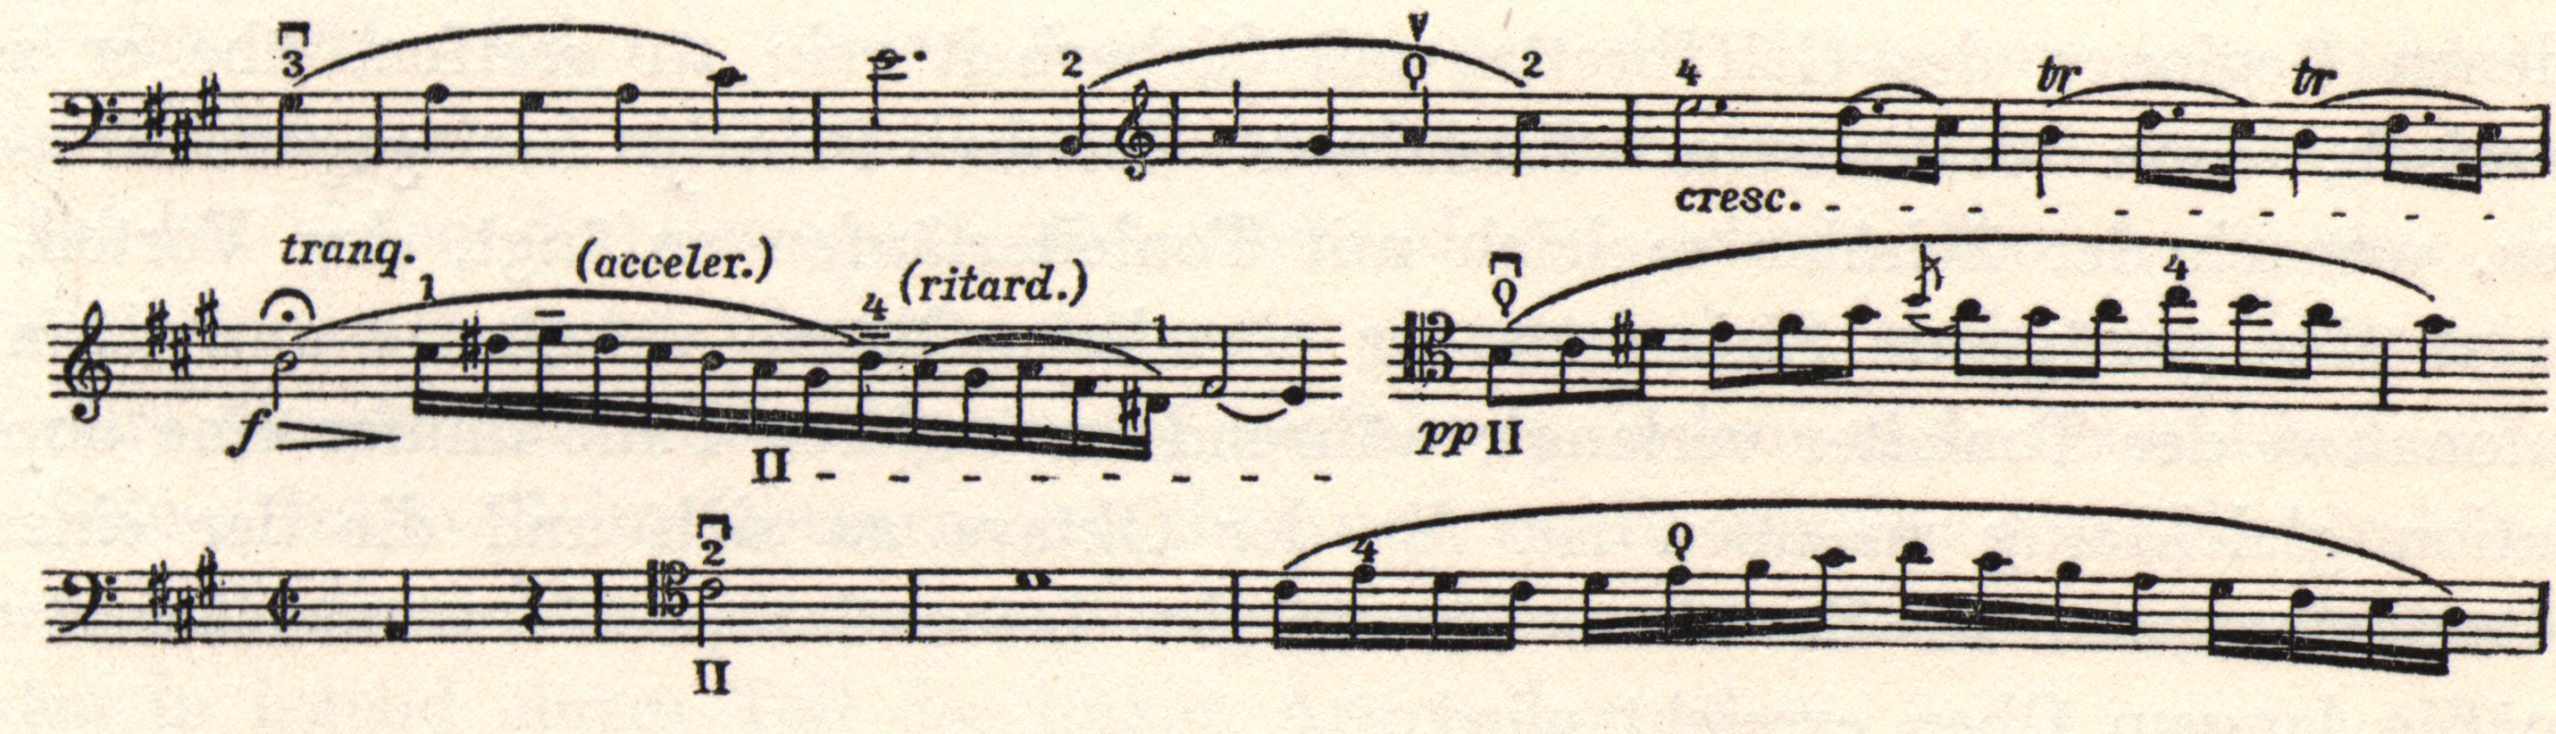
A criterion for flawless execution of a position shift can be found in measures 4 and 5 of the first theme in the d’Albert Concerto: there should be no involuntary portamento or rhythmic delays in playing the high D-flat, nor when shifting to B-flat and G.

We must therefore keep arm tension to an absolute minimum. Only from a relaxed state can we execute position shifts with complete precision. These physiological considerations regarding economical force usage align perfectly with artistic and aesthetic demands.
Concerning distances within any given position, we need to develop playing techniques that accommodate the spacing between notes across different positions while adapting naturally to the hand and fingers’ normal anatomical structure and function.
This consideration leads us to establish two fundamental concepts: hand configuration and hand position.
Within an artistic technique’s framework, success obviously depends on more than simply fingering individual notes—otherwise we could manage with just one finger! Instead, we must absolutely proceed so that adjacent notes receive adjacent fingers, ideally without changing position on the instrument. For this reason, we must establish certain foundational or basic hand positions.
By “position,” we mean the positioning of the hand on any section of the cello’s range, as determined by the notation. In general, we use the term “hand position” synonymously with “position”, but “position” refers more to the location on the fingerboard, i.e. the distance from the nut, and in this sense we speak of “first position,” “second position,” “third position,” and so on. (Due to the use of the thumb as a playing finger, which we can use anywhere on the fingerboard, the classification of “positions” does not have the same significance in cello playing as it does for the violin. In terminology, only the first four to five positions are actually familiar to cellists.) The term “hand position,” conversely, should be used to distinguish between the whole-step and half-step connections within the location of the hand: an “extended position” or “close position.”[3]
By “configuration,” we mean the complete basic or starting hand shape in terms of its relationship with the cello. This is characterized by the specific uses of the fingers in relation to each other, as well as the specific relationship of the fingers to the metacarpal and arm.
“Hand position” and “position” refer to the playing process itself, to the musical notation, whereas “configuration” refers to the physiological behavior of the hand during the process. The peculiarities of “close” or “extended” hand positions led me to introduce this term.
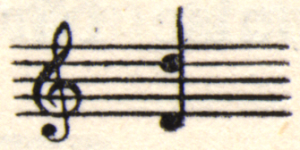
For example, in this hand position on the A-string, we have a close position because of the half-steps. Likewise, in the same position, the notes “B-C♯-D” and “B-C-D” form close positions.
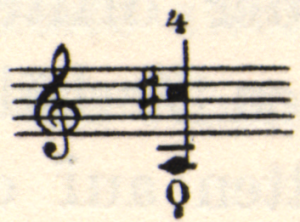
Here is another close position:
By the same token, we could describe other positions (such as C♯-D-D♯-E and so on) as close positions. Relatively speaking, the widest of the close positions would be A♯-B-C-C♯ on the A-string, and C♯-D-D♯-E on the C-string, because the closer we are to the nut, the greater the distances between half-steps.
If, conversely, we have two whole steps in succession, we speak of “wide positions,”[4] for example:

The widest of the wide positions would be, for example, B♭-C-D on the A-string.
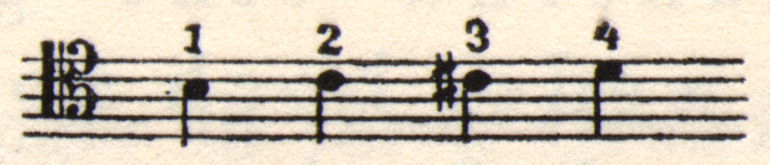
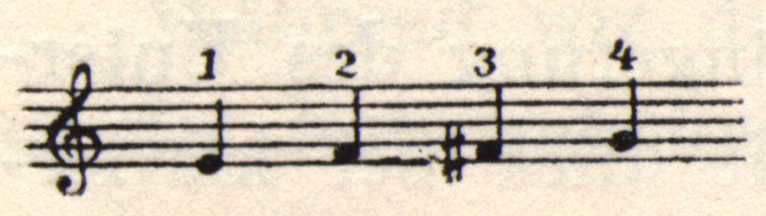
The difference in configuration between close and wide hand positions is illustrated by the following exercise, which should be played throughout without changing the original hand and arm position. This is the configuration for close positions:

And for wide hand positions:

Let us first deal with first position,[5], specifically with the close position. As an example, let us use the note sequence B♭-C♯–D. If the C is played cleanly, there is a tendency to play the C-sharp too low, especially if we place the hand in a relaxed position with the fingers on the string in a piano-like position. This is related to the anatomical structure of the hand: the second and third fingers are closer together than the first and second (at least, in a hand that is not particularly well-trained).
We should therefore discard the piano-like hand position, in which the transverse axis of the metacarpals runs parallel to the string, and adopt a more cello-specific configuration by pressing the second finger, bent at all joints, perpendicularly onto the A-string with the fingertip. The forearm should be adjusted so that it forms an approximately straight line with the back of the hand; the wrist is therefore neither high nor low, but lies in the plane of the forearm, without any lateral bending of the metacarpal towards the forearm (see image 68 of the Appendix). We assume that the player has a normally-sized hand for cello playing! In first position, with the close hand position, the metacarpal extends from the forearm and does not incline towards the thumb side, as it would in a piano-like setting.
The first finger is placed on B with a slightly less pronounced bend, the third is placed a little flatter but still bent, and finally the fourth is placed on the D with the first and second finger joints almost outstretched.
In this configuration of the hand and fingers, the curvature of the fingers decreases more and more from first to fourth. Here, the distance between second and third fingers becomes slightly larger than in the piano-like hand position. We can prove this, by placing the fingertips in a line on a stick that is positioned similarly to the fingerboard, and rotating the entire forearm including the metacarpal with the fingertips fixed in place. In this way, you can create a cello-specific configuration. The spaces between the first and second fingers, and between the second and third fingers, become slightly larger; the fourth finger, meanwhile, stretches due to its shorter length. This configuration allows us to play in the close position without actively spreading the fingers. We therefore define the close position configuration as the placement of fingers without spreading at the metacarpophalangeal joints. We call this the “first configuration.”
From this position, we can easily and simply reach B-flat without changing the connections between the other parts of the hand. With the hand and arm in the same position, we extend the first finger as we did the fourth, only in the opposite direction toward the saddle, so that instead of touching the string with the tip of the finger, it touches the string with the side of the finger joint facing the thumb. This action with the first finger is achieved by spreading the first metacarpophalangeal joint, with simultaneous extension of the first, second, and third finger joints (see image 69 of the Appendix):
The stretching of the first finger to create a whole step between the first and second fingers, as illustrated in the picture, makes it possible to reach the whole step B♭-C without significant changes to the hand’s configuration.
Through a supination movement of the hand with the first fingertip as a pivot point, whereby the transverse axis of the hand (the connecting line of knuckles on the back of the hand) aligns parallel to the string, we can transition from the close position to the wide position:

We use this wide position for sequences of notes that involve spreading the fingers at their base joints, with the exception of the lowest positions (where the above spreading of the index finger alone creates the whole tone from the narrow position).
We adopt the cello-specific configuration of the hand when playing in narrow positions due to the necessity of playing the half-step C-C♯ cleanly in first position on the A-string (namely, by increasing the distance between the second and third fingers), we must look for another basis for the fingering B-C♯-(d)-D♯. We know from anatomical observation that the hand’s stretch is greatest when the fingers are spaced apart like the spokes of a wheel, that is, when their metacarpophalangeal joints are extended. To take advantage of this possibility in cello playing—when it comes to overcoming larger stretches, as is necessary when playing the interval of a whole step between the first and second fingers—the hand must always be in a state of extension.
To this end, we place the forearm more into the supination position, with the back of the hand slightly lowered. This hand position, which we call the second configuration, is illustrated in image 70 of the Appendix. We therefore apply the latter position everywhere in the lower positions where the fingers have to spread out (this is not to be confused with the local process of extending the first finger back in the first configuration, when the hand is in the lowered second position).
In this derivation, we primarily focus on the A- and D-strings. On the lower strings, we generally make more use of the second configuration. Vertical finger placement is impossible here unless we push the neck of the instrument deep into the hand. When playing on the C-string, the wrist is farther away from the string than on the A-string. Consequently, the narrow position here is treated similarly to the wide position on the A-string. We therefore begin the C major scale C-D-E-F (fingered 0-1-3-4) with the second configuration.
On the G-string, this is no longer as pronounced; on the D-and A-strings, the first configuration is again clearly expressed in the close position.
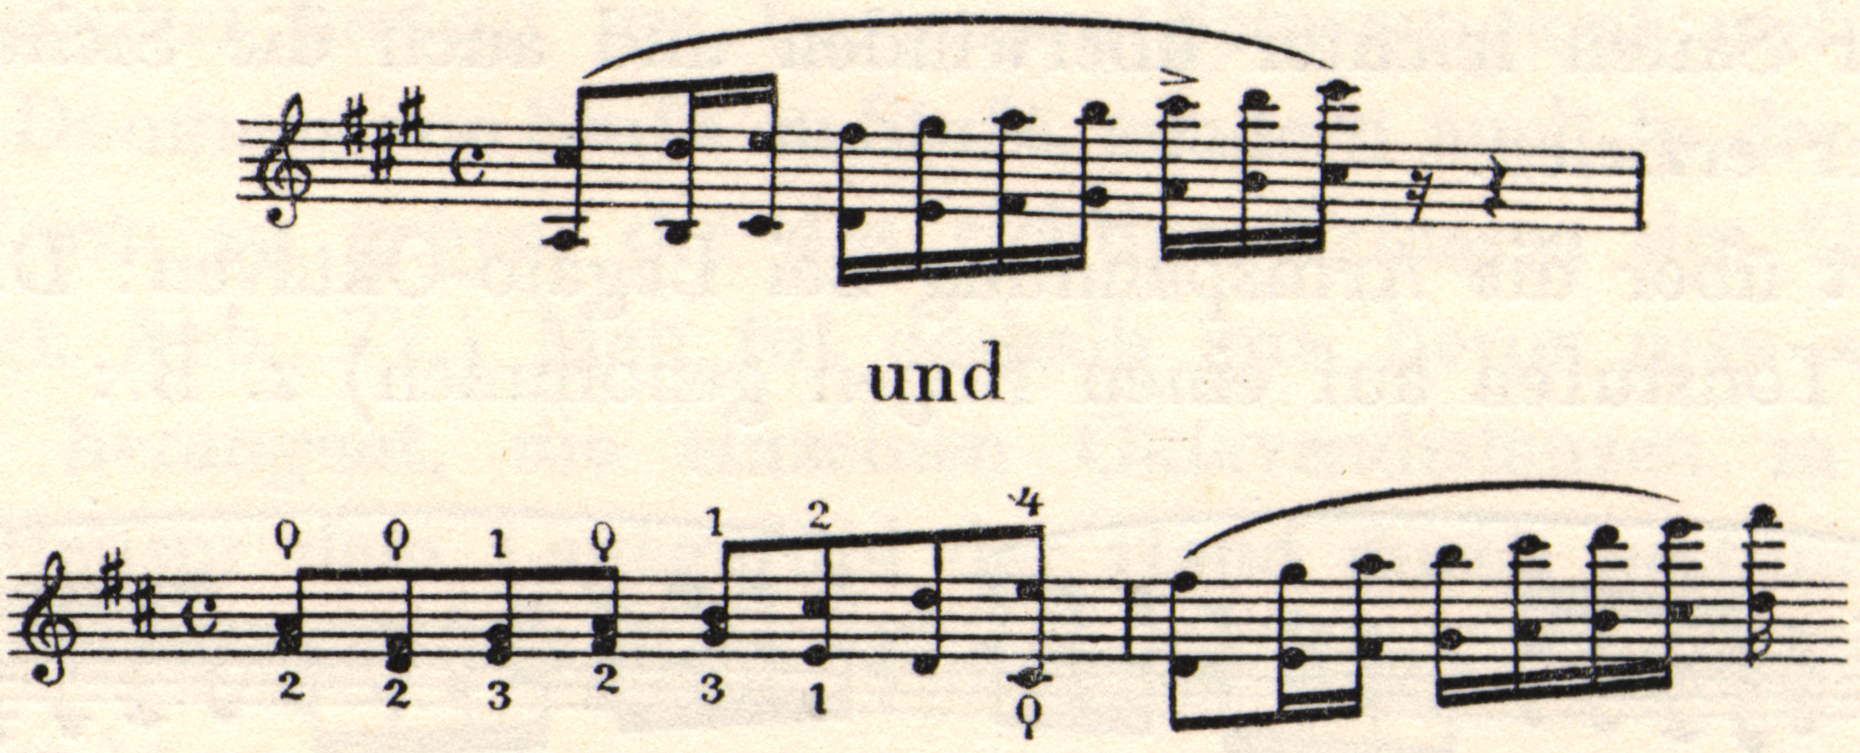
We can get a good impression of the difference between the two configurations by playing the following theme (from the last movement of Beethoven’s String Quartet in G major, Op. 18):

The first two measures are both played with the second configuration, and the following measures are both played with the first configuration.
With rare exceptions, in the generally accepted and codified fingering notation, the interval between the second and third fingers, as well as between the third and fourth fingers, is no greater than a half step; the interval between the second and fourth fingers is usually no greater than a whole step. Understanding the given intervals and moving through intervals as freely as possible leads to the establishment of the fingering. Correct fingering is therefore something that arises organically as a logical consequence of the natural hand position on the instrument.[6]
The interval from the first to the second finger can be either a half-step or a whole step. If it is a whole step, it is in the so-called “wide position.” This position requires the so-called second configuration, except for the case we discussed when creating the B♭-C-C♯-D position by extending the index finger back from B-C-C♯-D.
We have seen how easily we can extend the first close position downwards by extending the first finger back and, with the rest of the hand and arm in the same configuration, moving back with the first finger spread at the base joint.
The picture is different if we create the first wide position, extended upwards from the first narrow position, i.e. if we play B-C-C♯-D with 1-2-3-4 and B-C♯-(D)-D♯ with 1-2-(3)-4 one after the other, or even B-C-D (1-2-4) and B-C♯-D♯ (1-2-4). Since we are in the normal starting position, we can establish the wide position in the simplest and most natural way with a supinated rotation of the forearm. By way of the tip of the (initially) steeply-placed finger, the whole hand turns slightly away from the body so that we achieve the configuration shown in image 70 of the Appendix.
It is therefore a fixed rule that within the lower positions, the change from the close position to the wide lower position occurs without changing the configuration, only by extending and spreading the first finger. However, the change from the close hand position to the corresponding wide hand position (within the same place on the fingerboard) occurs by changing the hand configuration by means of a supinating rotation. Examples:[7]

Where it is necessary to shift the entire arm to achieve a proper playing position, this can be done calmly, using a moderate movement of the left shoulder. However, this forward-and-backward movement must be used sparingly, while the supination rotation of the forearm should be done emphatically.
Examples:
The above musical example not only illustrates the different hand positions (configurations) in close and wide positions but also the difference in the manner of chromatic progression. When moving up from the wide to the close position, only the first finger changes; however, when moving to the wide position, the entire configuration changes. Changes in position naturally involve the thumb and forearm as well. When descending, the corresponding adjustments occur!
During this action, the elbow remains at approximately the same height. The following short exercise can greatly aid in quickly learning the appropriate hand position:
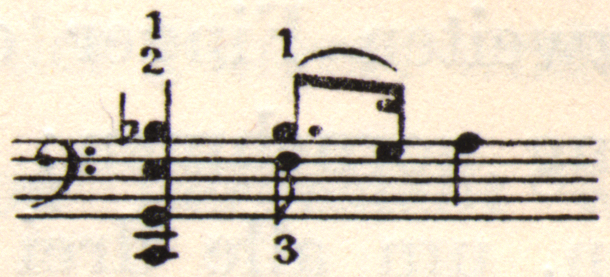
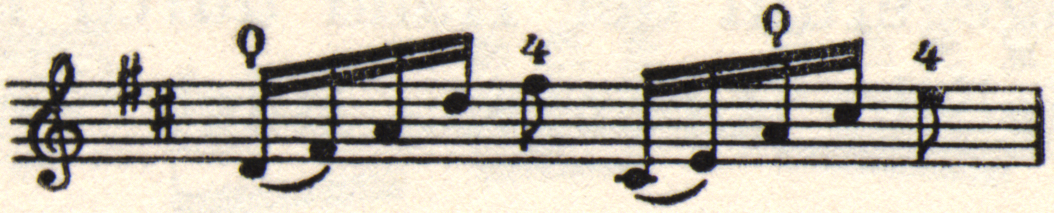
An illustrative example of this configuration change is provided by the first measure of the main theme from the first movement of Dvořák’s concerto:

It should sound exceptionally powerful and expressive. Since vibrating in such a stretched position is disadvantageous, it is advisable to initially place the first finger on B in a bent shape—that is, curved—as if we were in the close position, and then gradually transition into the wide position through supination rotation at the end of the same note to achieve the necessary reach.
We will take the following half note (B) again with the first finger placed upright by performing the supination backward (i.e., a pronation movement!). Of course, this change should be limited to the absolute minimum! By this method, we can fulfill the dual demands of expressive intensity and purity of intonation. We already see that the technique of the left hand cannot consist of a rigid, unilaterally fixed hand position, as has been advocated in ignorant works and even in some recent physiological writings, but rather a flexible movement principle that, on one hand, adapts to the conditions of the fingerboard. In summary, progressing from position to position requires a certain modifying adjustment of the hand to the scale length of the cello due to the reduction in the distance from note to note (see the following musical example):
On all strings, we must make the greatest “compensation” in half position. Here, extending the first finger here requires the greatest stretch, as does the supination rotation, which requires the greatest deflection. In third position, on D on the A-string, stretching the first finger back to produce the backwards extension to produce D♭-E♭-(E)-F on 1-2-(3)-4 is already so reduced that it can be bent a little more. Also, the supination rotation which we use to transition from a close hand position in third position (D-D♯-E-F, fingered 1-2-3-4) to the extended hand position in third position, where D-E-(F)-F♯ is played with 1-2-(3)-4, does not have to be as large. The difficulty continues in fourth position. However, some players with large or very flexible hands are able to move from close to wide positions with the same hand configuration, namely with the so-called starting position (in which the first and second fingers are placed on the string in a bent shape), i.e. the fingertip is pressed vertically onto the string. The fourth finger must also be placed slightly bent in fourth position because the distance between half steps is now smaller. If we did not do this, the note played by the fourth finger would sound too high.
Images 71 and 72 of the Appendix show the hand in fourth position in the first configuration (E-F-F♯-G) and the second configuration (E♭-F-[F♯]-G).
Let us return to our starting position! When the fingers are placed on the note sequence B-C-C♯-D according to the given instructions, they form an angle of approximately 45° with the grooves created on the fingertips by pressing on them. In addition to increasing the distance between the second and third fingers, which is so important for intonation, this position has two further advantages:
First, the transfer of pressure from the forearm via the metacarpal to the fingertip is most effective when the finger is bent at all joints and lands almost perpendicularly on the string (although the fourth advantage of this is often eliminated). Placing the flat pad of the finger on the string instead of the tip may sometimes result in a softer tone (and is therefore useful in certain cases for shading the tone in cantilena), but this method is inadequate for fast, virtuoso fingering, as the transmission of arm strength suffers a loss (first for physical reasons of leverage and secondly because stability at stretched joints requires greater expenditure of strength).
The second advantage of this basic starting position is that it provides unrestricted readiness for ascent to the highest registers. Since in these high regions, starting from about D5 onwards, the arm is at an acute angle to the fingerboard, and the hand is no longer parallel but at an acute angle to the A-string, the fingertips can only act on the string at an angle (i.e., the pressure grooves run in the same direction as when playing in the lower registers, approximately 45°).
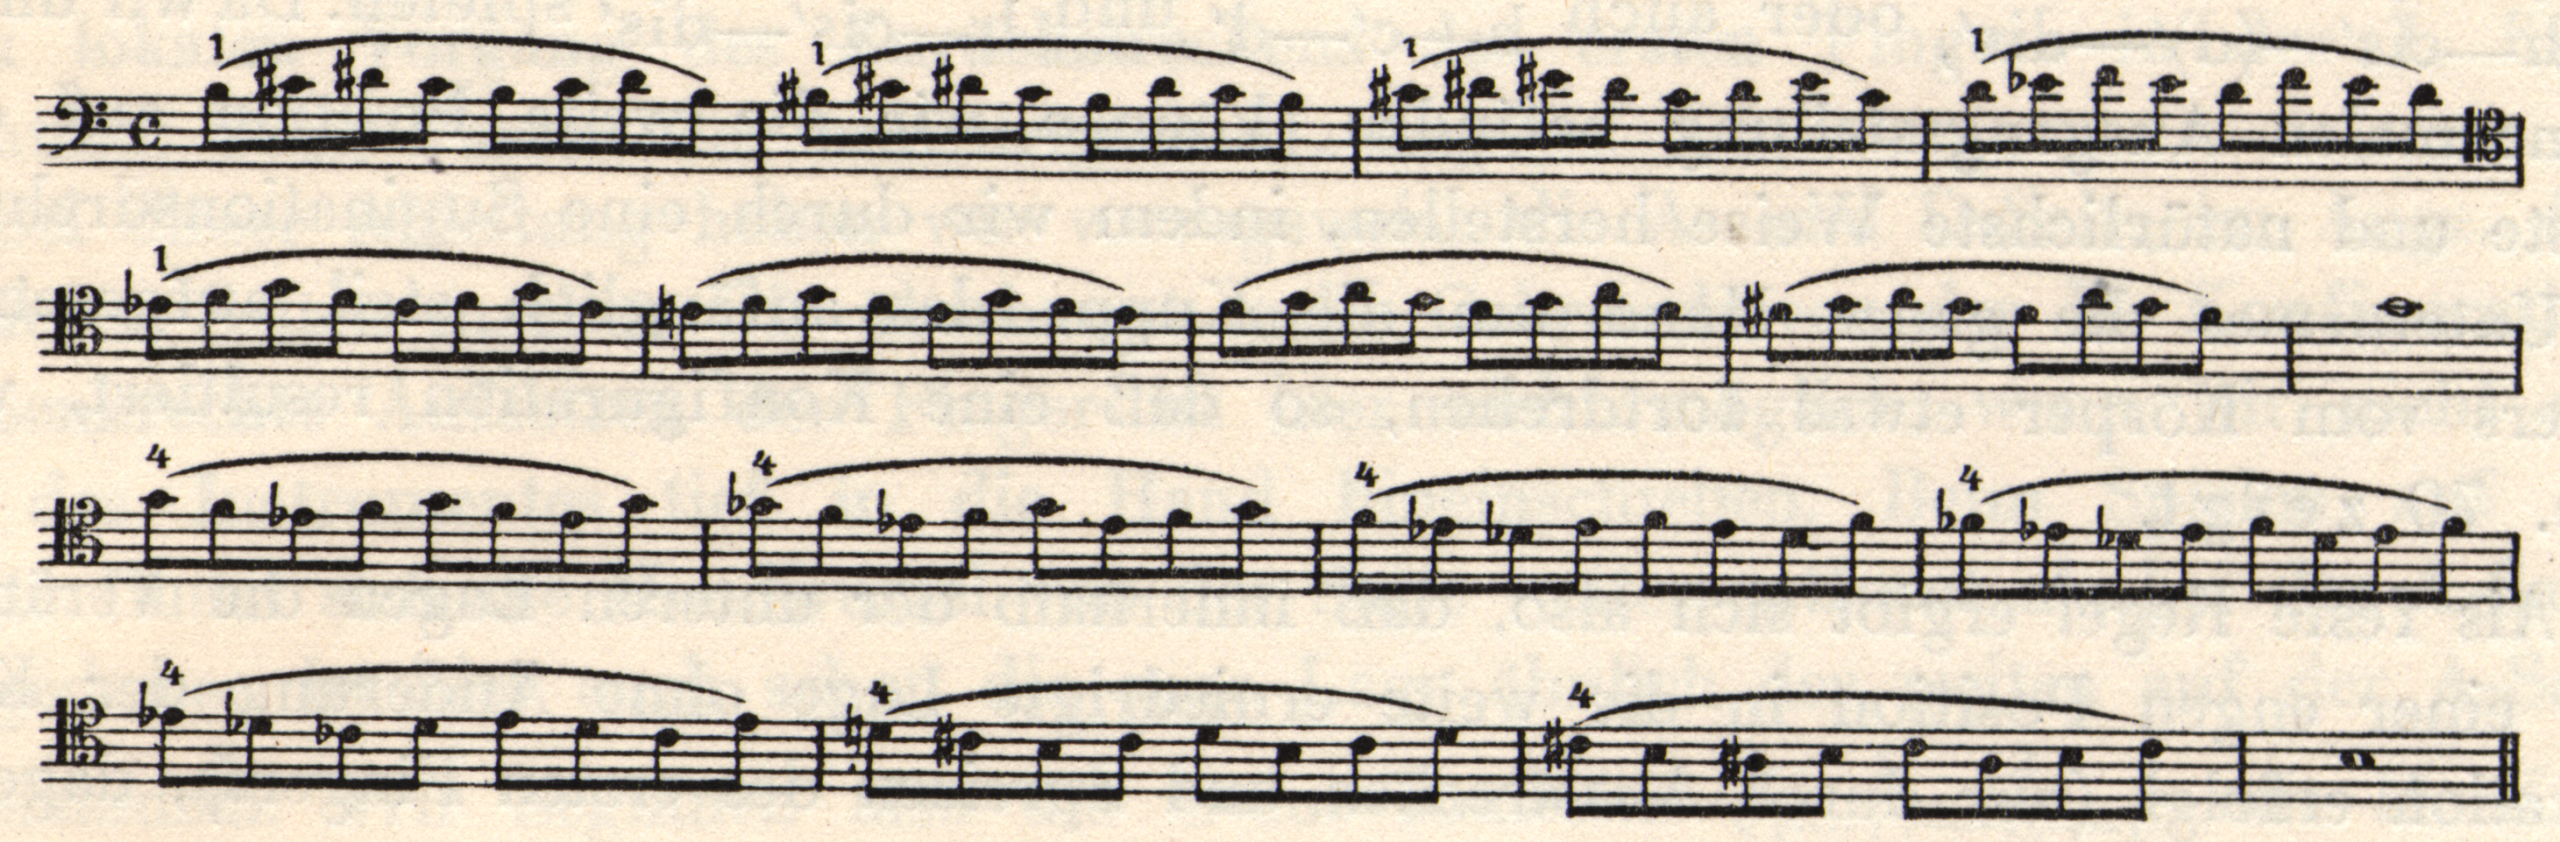
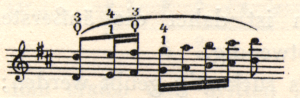
In other words: our starting position also provides a directional way for the fingers to glide upwards on the fingerboard. Likewise, the movement of the arm, the approach and distance of the forearm to and from the body, is determined in the simplest, most natural way. By simply stretching the arm, with the angle in the elbow increasing, the hand is carried from the lower to the higher positions, avoiding complicated rotations in the upper arm and shoulder. The elbow is already in the first position, close to the base of operation for the higher positions. Another starting point for achieving a correct hand position is the fourth position (see image 73 in the Appendix). When playing the following exercise in sixths, the change of position occurs only by shifting the forearm.
One more note may be made regarding the playability of certain passages, in which placing the finger steeply on the string (next to the nail) offers a significant advantage.
Passages like the following can only be played cleanly by pressing the tips of the first, second and third fingers as “vertically” as possible onto the string, so that the adjacent strings, both higher and lower, can vibrate freely, as in these examples from measure 2 of the Sarabande from Bach’s Second Cello Suite, or Cossmann’s finger exercises.[8]
As a norm for the lower four positions, we could establish that the tip of the second finger, as already indicated, is approximately perpendicular to the string; the position of the hand should be determined accordingly.
Let us now turn to the structure of the scale! Here, we have the opportunity to continually alternate the wide and narrow finger positions, using the configuration that best suits each setting.
While we consider the sequence A-B-C♯-D (0-1-3-4) on the A-string to be a close position that we can play in the normal starting position, we cannot easily play the corresponding sequence on the C string, i.e., C-D-E-F (0-1-3-4) in the same way. Despite the fact that it too is a close position, we must make some use of the supination rotation, i.e., adjust the hand to be more parallel to the fingerboard. The first hand configuration would only be possible if we completely grasped the cello neck with our hand, with the thumb extending well beyond the neck. That would afford us the opportunity to place the fingers “steeply,” as the first configuration requires, but it is not desirable at all. The thickest of the strings requires less of a sharp, point-like finger contact than the A-string; it’s sufficient to press the finger down at the place where the fingertip transitions into a softer pad. This is aided by a hand shape that more closely approximates the second configuration. First, we make the C-string fully accessible to the bow by slightly leaning forward with the upper body, and slightly tilting the cello. When playing on the C-string, the tone production often sound reduced. This is because the bow path we use on the C-string requires the arm to be close to the body, thus restricting its freedom of movement. Some cellists accordingly tend to pull the right leg back to gain greater freedom of movement. However, we can do better than this by making a slight movement of the upper body (leaning the chest forward!), which lifts the right side of the cello slightly and leaves the C-string more exposed. This way, we can maintain a more correct angle for bowing.
We now begin the C major scale with a hand shapen similar to the second configuration, despite the fact that D-E-F (1-3-4) is a close position (see image 74 of the Appendix). On the G-string, we approach the close position A-B-C (1-3-4) in a manner more similar to the first configuration. On the D- and A-strings, we naturally play E-F-G (1-2-4) and B-C-D (1-2-4) in the close position with the hand shape of the normal first configuration.
Now let us examine the D major scale!
We play the note sequence D-E-F♯ (1-2-4) using a pronounced second configuration hand shape, and will do the same on A-B-C♯ (1-2-4) on the G-string. If we were to play D on the C-string with a very bent finger, we might (using the first configuration) be able to play the E with the second finger, but for F♯ we would have to make a supination rotation; no amount of extending the hand would suffice to play all three notes using the first hand configuration. If is therefore better to use rotation within the sequence of notes by starting the D directly in the second configuration.
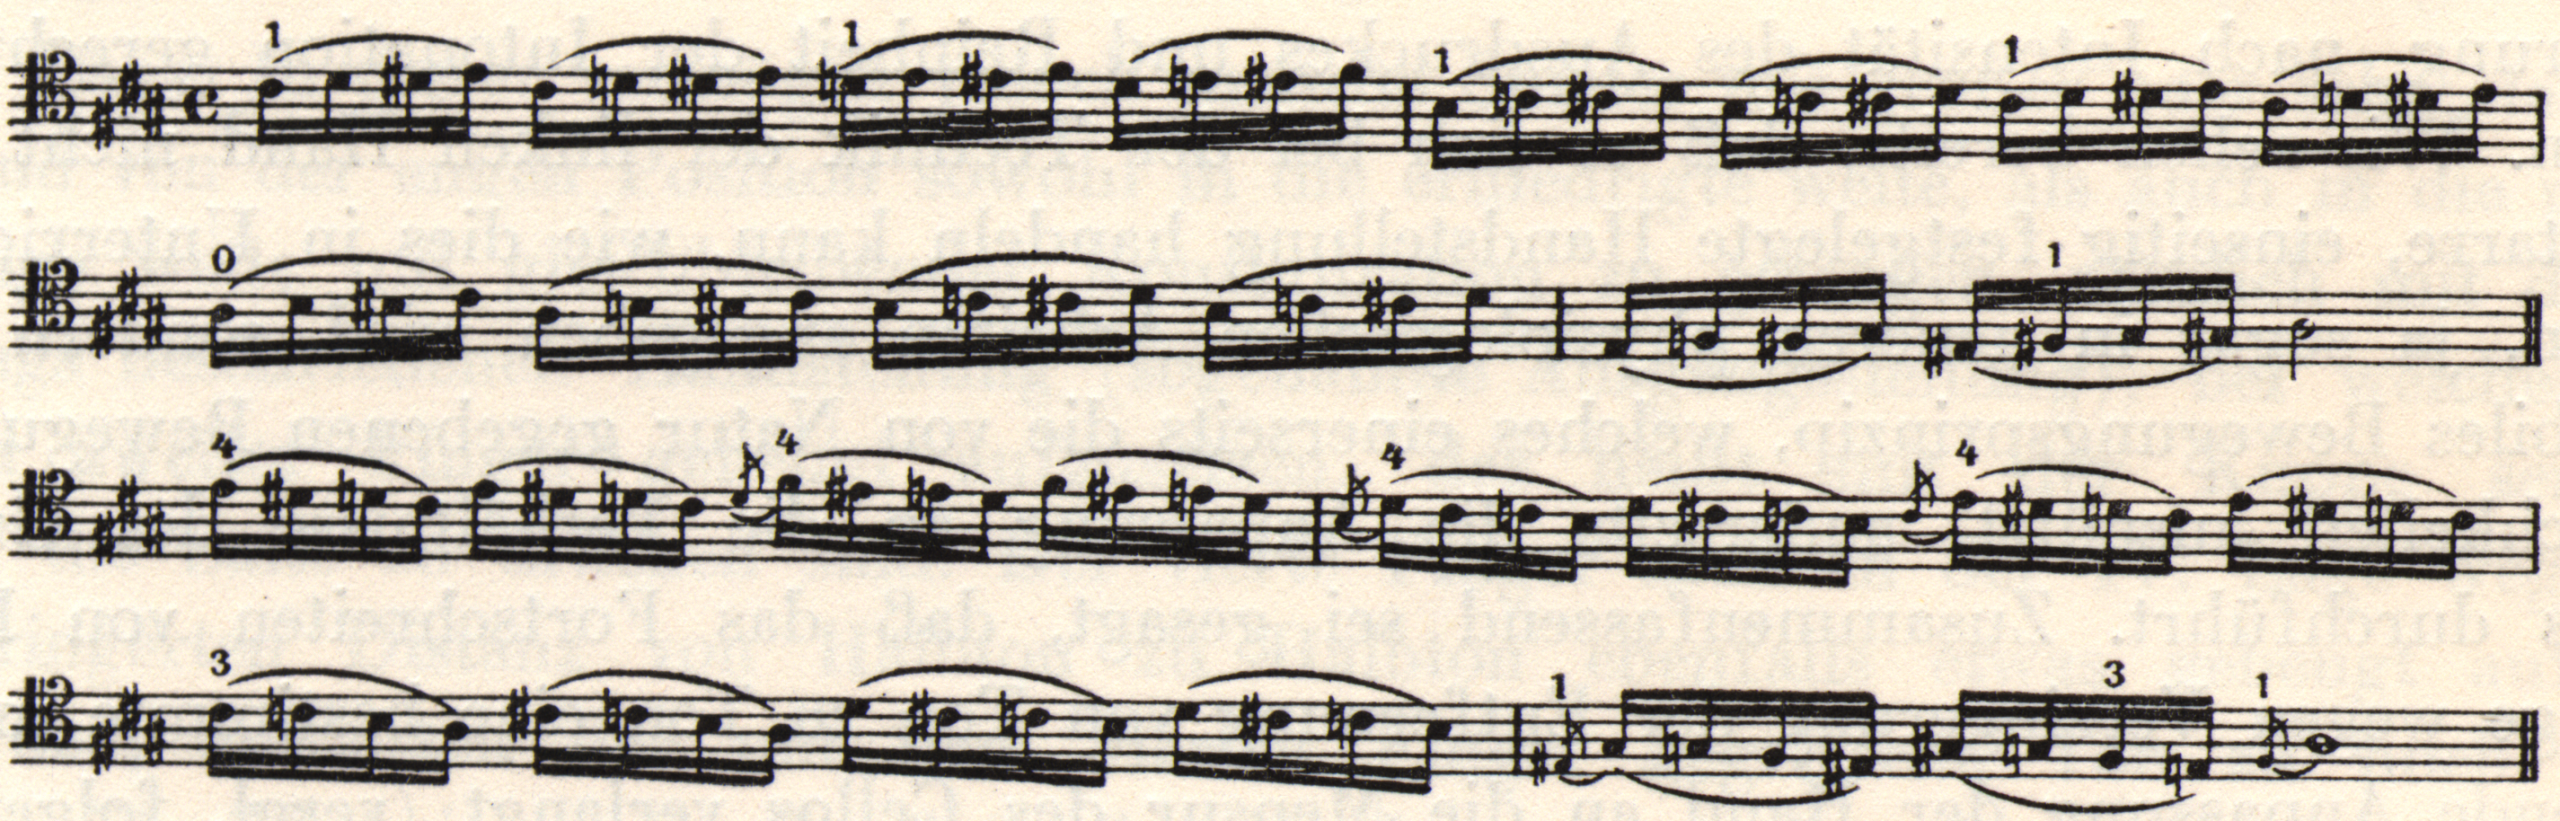
Finally, let us address the E major scale.

The note sequence E-F♯-G (1-2-4) is initially played using the second hand configuration. Now, a new aspect comes into play. Since we have to play the next sequence A-B-C♯ (1-2-4) with the same configuration on the G-string, we obtain the hand configuration on the G♯ and slide with the fourth finger (for practice purposes!) back a whole tone on the C-string to the auxiliary note F♯, so that the fourth finger rests directly opposite the C♯ of the G-string. In this way, not only will this note be rendered cleanly, but with the appropriate expansion of the hand shape, cleanliness is guaranteed for all the notes we are about to play. The hand is now in the correct configuration to play the note sequence A-B-C♯ (1-2-4). By pulling back the hand on the G-string from C-sharp to the auxiliary note B (where the fourth finger slides from C-sharp to B and needs to bend a bit more) the first finger reaches D-sharp on the D-string. Since the next note sequence, D♯-E-F♯ (1-2-4), indicates close position and is to be played in the normal first configuration, we must make a corresponding rotation on D-sharp with the tip of the first finger, which gives us the appropriate hand configuration. With this same configuration, we play the notes G♯-A-B (1-2-4). Similarly, on B, we slide the fourth finger back to the auxiliary note, A, so that we can play C♯-D♯-E on the A-string, a close position that we can perform using the same hand configuration.
For the descending scale, we take similar measures. We begin with the sequence E-D♯-C♯ (4-2-1), then slide the first finger forward a whole step on the A-string to the auxiliary note of D♯. This enables us to reach B on the D-string with the fourth finger, and play the note sequence B-A-G♯ (4-2-1) in the normal hand configuration. In order to now securely land on the remaining note sequence F♯-E-D♯ when changing positions, we secure the lowest note of the sequence by sliding the first finger back from G-sharp to the auxiliary note of D-sharp, and place all the fingers on the fingerboard so that the second falls on E, the third on F, and the fourth on F-sharp, a close position that requires the first hand configuration.
By raising the firmly placed fingers, we play the notes F♯-E-D♯ in succession. Then, on the D♯, we move the first finger a half-step to the auxiliary note E and, on the E, perform the supination rotation of the hand while simultaneously spreading the fingers, thus creating the second hand configuration that we need for the tone sequence C♯-B-A (4-2-1).
Note that during this rotation, the thumb is released from the neck of the cello, and its top joint rests almost at the left edge of the neck. Those with small hands might only be able to touch the neck with the tip of the thumb. In the position shift that comes next, the hand stays in the first configuration; the hand shifts up a whole step (the first finger goes to C-sharp), ensuring that all subsequent notes sound clearly.
Position shifts
Cleanliness and smoothness in left-hand technique depends not only on the correct setting of the hand and placement of the fingers, but also on being able to execute a flawless position shift.
On a keyboard instrument, it is possible to remove the playing hand from the keys for a moment and bring it to any other place on the keyboard, since the pedal action maintains sound continuity. On a stringed instrument, the connection between hand and instrument must not be interrupted, with some rare exceptions.
Shifting positions by sliding the same finger on the string probably needs no further explanation. Difficulties arise when leaving a position if the next note has to be played by another finger.
The thumb leads the position change; it moves like a slider on a slide rule with each shift, and ensures the correct arrival of the hand in the new position. Furthermore, it provides a counterforce for the fingers, thus supporting the forces of the upper arm and shoulder.
As a simple example, let us consider the following scale figure on the A-string:

We have, according to the characteristics of our instrument and the nature of our hand, derived a principle that in order to achieve a secure and serviceable left-hand technique, we must maintain the same special connection between hand and forearm. Furthermore, the transition from one hand configuration to the other can happen without hindrance, so that we can create a clean note-to-note trajectory.
Now, as an essential prerequisite for achieving this goal, there is the further requirement that position shifts must be inaudible in places where portamento is not permitted.
In the following musical example, we start in first position, using the close position and the corresponding hand configuration (which we call the normal starting position). Initially, we let all the fingers lie still or hover above their notes.
If we decided to perform a position shift while playing this figure, we could easily disrupt the correct relationship of the fingers to each other in the new position.
It has been shown through artistic practice—and this observation aligns with physiological findings—that the process of placing and lifting the fingers, which is almost exclusively the function of the finger flexors and extensors, should be kept as separate as possible from the process of shifting positions, which is primarily achieved through arm movement.
Thus, two types of movement run parallel, whose impulses and exertion of force often merge into a single, cramped action in inexperienced players, but can be separated through rational practice. By training the flexor and extensor muscles of the fingers only to perform the task of placing and raising the individual fingers, while the further movement of the entire hand falls primarily to the arm (bending and extending at the elbow joint), a division of labor is created that enables the clearest and most reliable technique.
We create an approach that enables the clearest, most secure technique by (1) training the bending and straightening motions of the fingers for the specific task of dropping down and lifting up from the string, while (2) assigning the forward movement of the hand primarily to the arm through bending and straightening the elbow. Accuracy within a position on the fingerboard depends solely on awareness of how the arm (preferably the elbow) is positioned.
In the following position shift, we will start on D with the fourth finger, then make a lightning-fast movement of of the forearm at the elbow joint, and place the first finger on the E with the same hand configuration. (Of course, the configuration does change slightly due to the higher position, since the fingers will be a little closer together, but it generally remains the same when we move up and down between higher and lower positions.)
In fast runs, for example when playing a four-octave scale, momentary pauses occur at the points where position shifts occur; otherwise, it would disturb the uniformity of tone. However, these pauses must be so small that we can neither see them nor feel any inhibition in the muscles of the arm (they are only noticeable in slow motion).
Let us briefly touch on another type of position shift that is occasionally taught. In the above sequence of notes, there is an idea of merging the movement of the fingers and the advancing or retreating hand into a single movement: the hand contracts at the beginning of the note D, with the first finger moving down the string towards the fourth finger. At first glance, this idea has something appealing about it: people think it will reduce an “audible jerk” during the position shift. However, proponents of this theory completely overlook the fact that any acoustic effect when playing a string instrument (except of course for pizzicato) is only achieved through the bow.
Therefore, if the position shift occurs as an “audible jerk,” this is the result of an involuntary reflex of the right arm, which the player should have learned to avoid!… While this way of shifting shortens the path the first finger has to travel after completing the note D to get to the E, it has the significant disadvantage that the cohesion of the hand shape, the configuration, is destroyed. This means a complication for our sense of spatial orientation—namely, our sense of position on the fingerboard.
And with this, we come to a discussion of the physiological connections between hand and arm.
It would be extremely one-sided and incomplete to focus solely on the fingers and forget the adjustment and posture of the arm, as well as the regulation of shoulder and arm force. Admittedly, the latter factors do not play as important a role as they do with the bow arm. Nevertheless, we cannot completely disregard them.
We have already learned that the change from the first configuration to the second is achieved by a slight rotation of the forearm at the elbow joint in the sense of supination.
We have further deduced from the physiological laws of movement that it is essential for uninhibited technique of the left hand that the individual muscle groups be trained to a certain degree of isolation of their function. Bending and straightening of the fingers are accomplished with the flexor and extensor muscles, while gliding with the entire hand along the fingerboard is achieved by flexing and extending the forearm at the elbow joint, without one movement needing to interfere with the other. This fact, of course, will only become apparent to the player when they consciously experience the movement process. Through this concentration, they gain an important technical means for efficient practice.
Admittedly, at first glance, such a division of labor will seem strange to the reader. They should, however, be convinced that a universal law—by which good movement distinguishes itself from bad through economical use of energy and refinement of the external movement process—also fully applies to the technique of the left hand. Since the setting down and lifting up of the fingers is skillfully managed by the forearm muscles with assistance from the short hand muscles (lumbricals and interossei), and the shifting into positions on the fingerboard is achieved through the bending and straightening of the elbow joint via the muscles of the upper arm, there should ideally be no tension in the upper arm during a trill or a passage within the same position. However, this ideal state cannot be fully achieved, especially in high positions on the fingerboard, because the arm must be constantly supported by the shoulder. Therefore, our goal is to perfect patterns of movement in such a way that excess tension and co-tension (the unnecessary sympathetic tension of other muscle groups) in the shoulder’s postural muscles remain as low as possible!
Now, however, the tension in the upper arm can be relieved by counter-pressure of the thumb, so that the pressure remains almost entirely limited to the forearm.
When using thumb position in higher positions on the fingerboard, this counterpressure of the thumb disappears (see image 75 of the Appendix). One can easily observe how the broad muscles on both sides of the armpit tense up more when the thumb is placed on the string, for example when the fingers push the string with considerable pressure.
It is therefore a matter of practical wisdom not to exert more pressure on the fingers when playing than corresponds to the resistance of the elasticity of the string. Apart from the fact that the volume of the sound is completely unaffected by finger pressure, excessive pressure can lead to serious physiological disadvantages of the kind described above. Even in lower positions on the fingerboard, where the counterpressure of the thumb facilitates the action of raising and lowering the fingers and limits movement to the forearm as much as possible, it would be wrong to increase finger pressure unnecessarily. Doing so restricts the free mobility of the thumb, resulting in uncoordinated movements and hindering speed. Many cellists never achieve a fluid technique for this reason alone; others experience pain and cramping in the shoulder because they apply excessive pressure to the normal function of holding the instrument. This soon accumulates to the point of overall strain, causing feelings of fatigue and pain. Of course, for the purposes of gymnastic exercises, it is permissible to exaggerate the force exerted in finger placement and especially in lifting the fingers. This is actually a healthy principle during slow practice, because in “real life” the extensor muscles are usually at a disadvantage compared with the flexor muscles. But one should learn to scrupulously avoid allowing increased tension to develop in the upper arm at the moment of a position shift or a wide leap. There will surely come a time when one can detect incorrect execution in an instrumentalist’s playing through objective measures (such as electrophysiological measurements). For the time being, we must be content with checking for excessive tension by palpating the player’s arm. Considering the excitement, inhibitions, and anxieties that performing in public causes for many people, it is not surprising that increased, inappropriate, and harmful tensions in playing technique arise reflexively under such conditions.
Very often, these physically problematic states are psychologically conditioned. When in front of an audience, people whose nervous systems lack the strength or resilience expected of a normal, healthy person experience nervous anxiety, negative feelings, memory lapses, and especially the lack of freedom in movement. This is the well-known, willpower-crippling condition known as “stage fright.”
General relaxation of the limbs is an important prerequisite both for successful study and also for eliminating the aforementioned inhibitions effectively.
In otherwise healthy constitutions, physical hindrance is only caused by a lack of spatial sense and awareness of movement. We perceive this as clumsiness.
We now want to characterize the performance of the left hand even more precisely, and for this purpose we generally divide its movements into limited ones. That is, those with a specific range of motion, and those with an indefinite range of motion.
By movements of the first type, we mean all consciously executed actions, such as lifting and dropping the fingers, bending and extending the forearm from the elbow joint during position shifts, and gliding the finger along the string for long distances.
The second type of movement includes almost all the primary motions of playing, such as forearm rotation during vibrato in the lower registers, as well as the short bending and straightening movements of the elbow during vibrato in high registers. (Vibrato in thumb position is a combination of forearm rotation and the latter type of shaking movements in the elbow.)
Furthermore, we also include the slow rotation of the forearm when playing scales rapidly in the lower registers. This allows the speed to increase, and gives the playing a brilliant fluidity and evenness. Finally, we include the supination rotation of the forearm that occurs when we transition from the first to the second hand configuration.
We will first discuss vibrato. The mechanics of vibrato, the aesthetic aspect of which will be discussed elsewhere, are based primarily on the rotation of the forearm.[9] If we combine supination and pronation into a unified movement and increase the speed, we obtain the shaking, pendulum-like oscillation that characterizes vibrato. The axis of the forearm’s back-and-forth rotation lies goes from the elbow joint to the fingertip of the vibrating finger. Increasing the number of oscillations while simultaneously decreasing the magnitude of the rotation transforms a slow, wide vibrato into a rapid, narrow vibrato.
The fine gradation of vibrato is based on the use of the hand as a vibrating mass, similar to the vibrating mass of a pendulum. Acoustically audible individual vibrations must never be allowed to occur. (It’s vibrato! Not tremolo!) Vibrato should be a natural shaking motion.
First and foremost, pay attention to the absence of tension in the upper arm. All too often, cramping develops in the upper arm areas during the course of training, especially in those who are not naturally able to coordinate the forearm rotation.[10]
However, due to this tension in the upper arm, vibrato can completely lose its role as a secondary movement and becomes obtrusive and laboriously coordinated. The difference between them is perceptible, not only through the sense of touch; it also affects the listener’s perception of the character and quality of the tone.
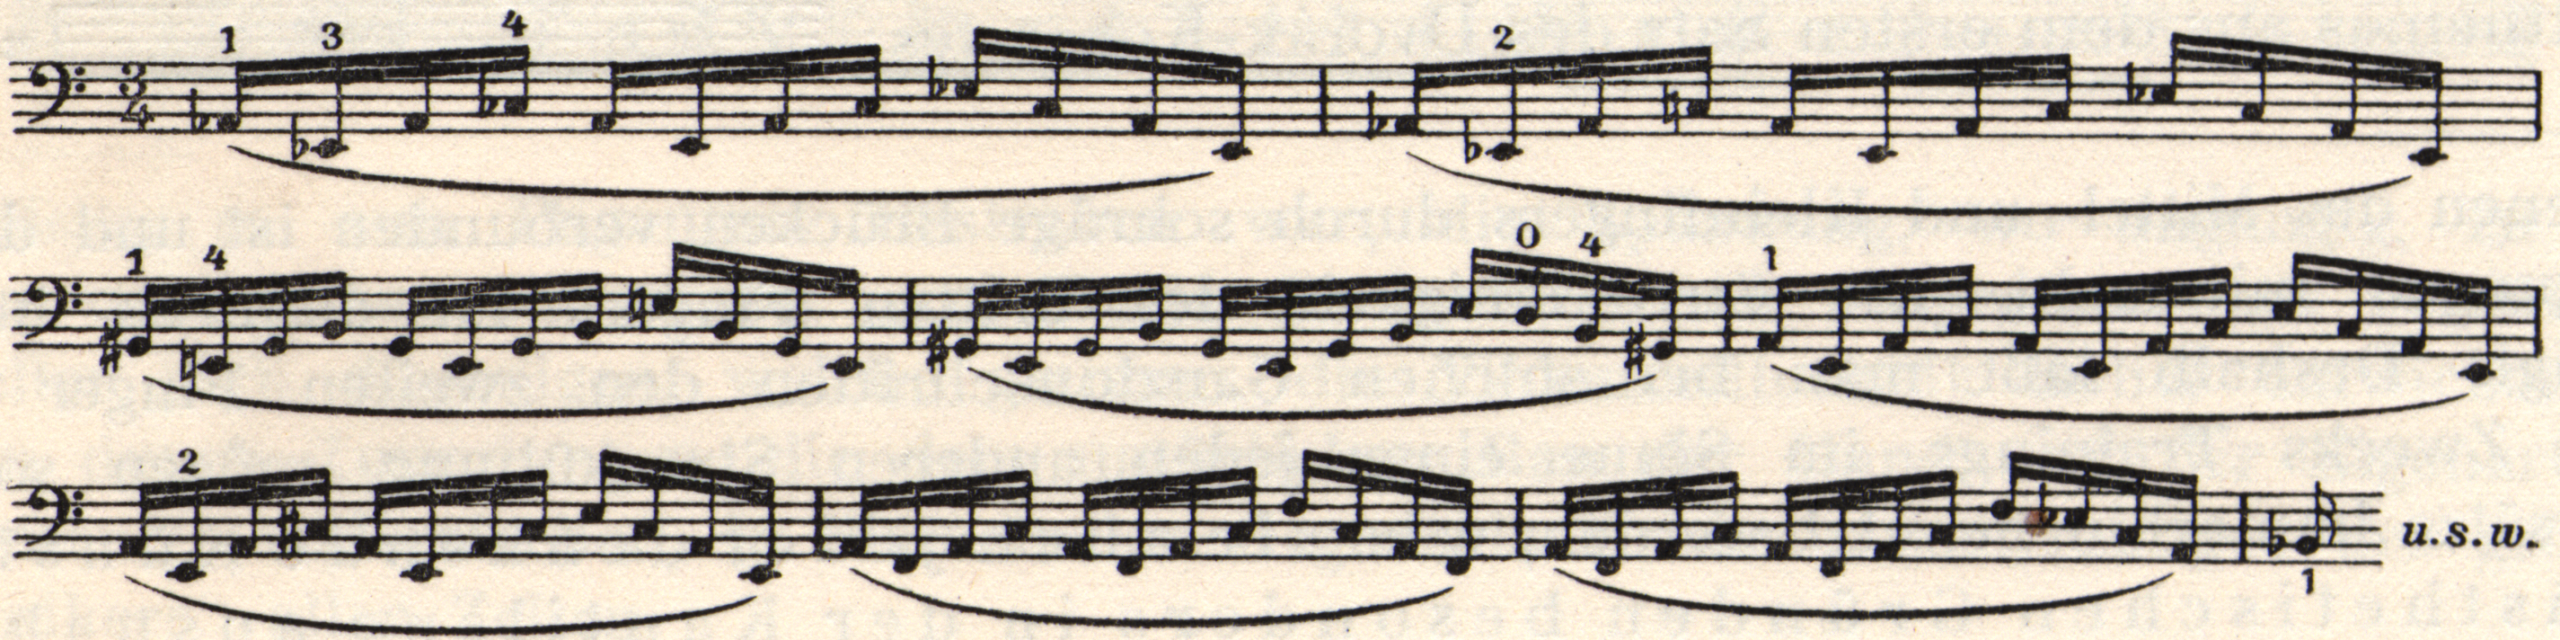
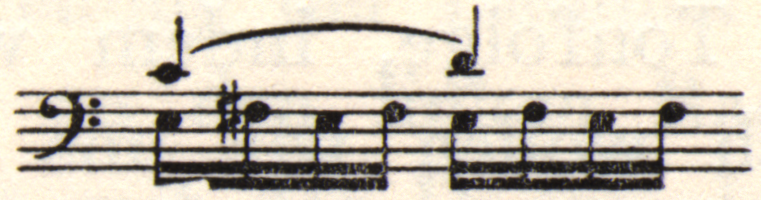
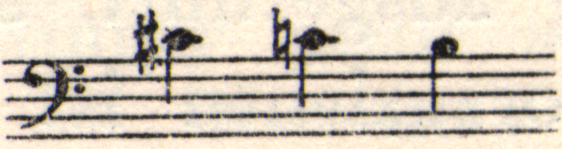
We can illustrate another of the types of aforementioned secondary movement, the supination rotation of the forearm for shifting from first to second position, using an example from the E major scale discussed earlier:
We position the first finger vertically to make a D-sharp on the D-string with the hand in the first configuration. As we slide the first finger to the auxiliary note E, we slowly supinate the forearm. At the same time, the index finger straightens and comes to rest on E, with the side of the nail coming to face the thumb.
To perform this gesture effortlessly, the elbow must move slightly forward and downward, or in other words, the shoulder must give way slightly and lean forward. The forearm is positioned as if one were pointing the index finger diagonally upward toward the tip of the nose.
Now, this adjustment to the hand shape only makes sense if it reaches the G-string in the right configuration to play the notes C♯-B-A (4-2-1). This can only happen if the supination rotation is accompanied by an extreme spreading of the other fingers.
In terms of the forearm rotation during rapid scale playing in the lower registers, the following should be noted for this secondary movement:
While during slow scale practice we emphasize the precise primary movements of dropping and lifting the fingers, during rapid playing we adapt to the overall movement by rotating the forearm. Consider, for example, the C major scale! If we slightly supinate the forearm when fingering the last two notes on the C-string in the scalar sequence C-D-E-F, we bring the third and fourth fingers closer to each other on the string. The same applies to playing B and C on the G-string, F and G on the D-string, C and D on the A-string, etc. When we play rapidly, this creates a certain forearm rotation. However, the rotation must not be so pronounced that it becomes and primary movement, relegating the finger action to a secondary role; this would inevitably lead to an inarticulate, unrefined technique. Certainly, some have occasionally overestimated the importance of forearm rotation (Steinhausen even wanted to make it the main movement for playing the piano, which would by comparison cause the activity of the individual fingers to recede completely into the background).
However, it is very valuable for supporting passagework. For example, every scalar figure that crosses strings, whether ascending or descending, requires the aforementioned rotation when playing at a fast tempo. For example:

Nevertheless, we attach great important to equalizing the individual fingers as much as possible. The aim of equalization is to bring the functions of the naturally weaker third and fourth fingers closer to the capability of the first and second. The more the performance discrepancy between the individual fingers—naturally due to anatomical and physiological characteristics—is balanced out through special exercises, the more homogeneous the playing of the left hand becomes. We do not claim that the only way to improve your hand is to practice on the instrument. Through proper hand exercises and a special type of massage, the performance of your fingers can undoubtedly be significantly improved and the path to that goal shortened by instrumental practice. One must, however, beware of excessive and reckless experiments in this direction; systematic training, which respects the vulnerability and sensitivity of the tissue can lead to significant results. However, harm has been done by so-called medico-mechanical treatment. Irreparable damage from excessive exertion of force and overstretching is not uncommon. In this regard, we should take athletes as role models, since their training seeks to improve performance incrementally.
Here are some gymnastic exercises that can significantly increase the spreading capability of almost any hand.
- Start by extending your right hand fingers and positioning your thumb lengthwise so it can touch your pinky finger as much as possible. Next, stretch out your left hand fingers so they spread apart like the spokes of a wheel. (An untrained hand usually shows unequal spacing between fingers – typically the second and third fingers are closer together than the first and second, or third and fourth.) Now gently but firmly wedge your right hand into the gaps between your left hand fingers. Once positioned this way, close your right hand into a fist. This will push your left-hand fingers apart and gradually increase their spreading ability over time. You can also try rotating your right hand within the gaps between fingers of the left hand, move it back and forth, and push deeper towards the base of the gaps. Repeat the same procedure in the gaps formed by the third and second, or second and first, respectively! With a properly performed massage, the tissues of the fingers and metacarpals can be stretched to such an extent that the mobility and grip width of the hand are considerably increased. However, caution should be taken against any use of mechanical aids! There is no machine that can replace the functions of the hand in this regard.
- Another measure for equalizing the fingers is to bring the functionality of the extensor muscles closer to that of the flexor muscles. In almost all practical activities in life, we predominantly use the flexor muscles of the fingers, such as grasping and grasping an object, holding something in the hand, and pressing and pressing. The greater resting tension (tone) of the flexor muscles can be seen from the fact that the fingers assume a more or less bent position at rest and in the absence of any voluntary action (e.g., when the arm is suspended while walking). For this reason, the cellist who values improving their manual disposition should practice a simple étude in such a way that the fingers are raised to the maximum extent possible. A gymnastic exercise can also be used for this, which has a very beneficial effect on the development of the extensor muscles and eliminates inhibitions, especially in the metacarpophalangeal joints. Hold your left hand calmly in front of you, back of the hand facing upwards, in a straight line with your forearm, letting the fingers hang down without active tension! Now, keeping your metacarpals still, fling all your fingers upwards with lightning speed and immediately let them fall passively. It should look as if the fingers suddenly jump up. The momentary impulse to the extensor muscles deactivates the flexor muscles for only a moment, thus achieving almost the pure effect of one muscle group.
When you have to play something that requires the fingers to play notes on more than one string—chords, octaves, and sequences of tones that include complicated interval formations in quick succession—the technique of fingering adds to the sense of position and spatial awareness, as previously mentioned. These last two factors are interrelated. By consciously adopting specific finger spacings, combined with the hand configuration typical for a multi-string fingering, you develop associations for muscle memory. (Paganini is said to have enhanced the virtuosity of his left hand in this way.)
Those who are accustomed to processing new feelings with utmost concentration and practicing accordingly, as recognized by the movements of the body, have an advantage over those who practice merely mechanically—whose strength lies in endless repetition and habitual but ultimately superficial mastery of a daily task. A certain kind of intelligence is indispensable for the development of the musician. Mental agility is required even for the mechanical aspects of playing, since mastering technique demands insight into the efficiency of the process used. Practicing correctly in this sense means maintaining the coordination we know to be correct in an intelligent, objective manner. To play artistically, then, we use the skills of physical coordination that we have acquired through practice; such skills are the servants that help us to realize musical ideas.
In our time—in which a certain movement towards rejecting materialism is already reappearing—the following consideration may perhaps be a welcome guide for some: the music student who sees the mastery of an instrument as his life’s work should understand that just practicing the instrument cannot make him a “chosen one” of the arts or an interesting person. The emergence of artificially cultivated virtuosity, already discussed in one of the first chapters, is a fact and a consequence of the circumstances of the times. The fame of the mere virtuoso, however, is the most transient and uncertain. An artist does not achieve long-term recognition by merely possessing a limited repertoire, which, lacking any fresh input, over time acquires that fatal aftertaste of routine that slowly but steadily diminishes the number of concertgoers. This is achievable only by nourishing their art from multiple sources and by being able to interpret a newly created work at any time. The impression of an artistic achievement rests not only on a faithful rendering of a composition, but on the artist’s ability to recreate the piece, as it were, bringing it to life anew before the listener. But can the artist achieve this supremely inspiring goal, whose realization is actually worth studying, if, in the moment of re-creation, they have to wrestle with the intricacies of mechanics, constantly thinking about the bow or the left hand? Can they transfer their inner enthusiasm to the listener and strive for expression if they must focus their entire attention on mechanical processes to deliver all the notes more or less accurately? No, first they must overcome the rigidity of the mechanical before they can even think of communicating their interpretation. This conception of the work of art, however, must not be dictated by mechanics, but must be based on the free decision of an artistic will. What detours could be avoided if the student were accustomed to thinking of this goal even in the smallest performance on their instrument!
But they may not even suspect how an inappropriate arm position or a neglect of rhythmic accuracy during practice reinforce the incorrect coordination. This unfailingly leaves its mark on the muscle memory and creates an obstacle on the path to perfection. Even in their great desire to make music, they do not always realize that uncritical, improper practice can easily dull the sensitivity of listening and prevent the perception of subtle differences in rhythm and dynamics, poor intonation, and unwanted accents caused by the bow. They do not have the keenness that demands immediate correction and improvement. The student begins to daydream at the wrong time at the instrument. Based on these considerations, the student can only be urgently advised to view practice as a form of self-education, to understand each individual mechanical exercise as a mental training, to develop their sense of muscles and movement, and to try out the special instructions of this work if they are still unknown to them, both consciously and with a certain joyful enthusiasm. It is important to “be awake”! It’s quite astonishing how positively the inner joy of experience influences creativity and how an increased effort of intelligence can make studying more fruitful! By “intelligence,” we mean not only the ability to make logical judgment, but also the development of the psycho-physical functions that make us more adept at movement: specifically, the ability to realize concepts in sound through the most appropriate movements. In short, we could call this the “instinct for movement.”
We observe these phenomena particularly often in so-called child prodigies. Unfortunately, the conflict between the child’s innate talent and love of music and the desire, fostered by relatives and blind admirers, to escape rational training can easily lead to the downfall to the child prodigy! If the training of the mind, the cultivation of natural abilities, and the disciplining of movement are neglected during the receptive years, the result is permanent damage. It is all too easy to forget that achievements that seem astonishing and inspiring when performed by a child are no longer so fascinating later, when the charm of youth has faded without being replaced by more valuable and enduring qualities. The neglected child prodigy is then easily plunged into decline.
Thumb position and hand placement in the upper registers
a) In general
When playing in thumb position, don’t forget the placement of the thumb!
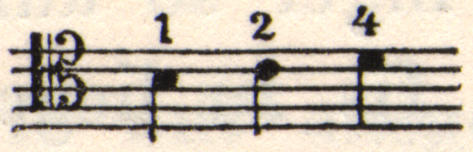
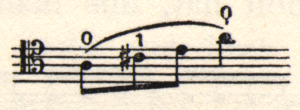
The scale teaches us the correct hand position in the thumb positions: if, for example, we can play the following sequence of notes cleanly:

we can also play these intervals with the correct hand and finger shape:

The arched configuration of the hand must be maintained wherever possible. The further we extend the thumb position toward the lower registers, the larger the spacing between the individual fingers becomes. The arch of the hand thus becomes increasingly flattened. In the following example (chromatic scale in the thumb position), the individual fingers are advanced without changing the hand position:

Whole-tone intervals shrink to such close distances the higher we play in thumb position that we can use the same, moderately inclined position without having to change the hand configuration. Thus, there is no need to change the configuration every time we change from narrow to wide hand positions via supination rotation, as we had to in lower positions; instead, we can get by with the same hand configuration. Nevertheless, we do not completely dispense with the secondary auxiliary movement of rotating the forearm during rapid movements in the same position, which are associated with string crossings, especially when using the fourth finger. This is because the fourth finger, due to its shortness, requires the hand to be tilted towards the bridge in a supinated manner.
Examples:
From Haydn’s Concerto in D major:
Various passages from Beethoven’s Sonata in A major:
From the Schumann Concerto:

It is less apposite to rotate the forearm when playing scales on the same string, but more so when inserting the thumb into a broken chord.
The security of the left hand, in the higher as well as lower registers, relies largely on correct thumb function. In the lower registers, it acts, as mentioned, like a slider on a slide rule; it is the hand’s guide, following every change in position and ensuring the appropriate adjustment of the hand. Furthermore, it creates a counterforce for the fingers, so that it relieves the upper arm and shoulder forces (as explained previously). In position, the thumb gives the arch of the hand the necessary strength and security. One of the thumb’s functions, namely counterpressure, is lost in high positions, but here the thumb has the important task of forming a base for the contact of the other fingers on the string, in the manner of a movable nut. (See image 76 of the Appendix.) The thumb should therefore always rest at right angles to the strings (assuming that the instrument is properly strung), so that it covers the fifth over two strings and can immediately follow any shifting movement, always keeping a distance of a major second from the first finger.
b) Special cases
1. Octaves
The particular difficult of playing octaves is not only in correctly advancing the thumb from place to place, but also in getting a hand shape that ensures a correct result. (See image 77 of the Appendix.) Therefore, before beginning to study scales in octaves, it is a good idea to memorize the individual octave distances in various sections of the scale with exercises that firmly establish hand position. (Such as Grützmacher’s Daily Exercises or Becker’s Mixed Finger and Bow Exercises.)
Once the student has acquired the ability to play individual octaves in different regions of the fingerboard reliably, they should practice scales first chromatically, then diatonically. This approach has the advantage over starting immediately with scale runs in that first, it ensures sufficient accuracy in individual octaves before demanding the intonation of the whole scale. In other methods, one must always simultaneously practice double intonation—that of the octave itself and that of the individual scale steps—so that a clear solution to the intonation problem is often only achieved after long and strenuous practice.
The well-known octave passage in Volkmann’s Concerto offers excellent material for perfecting octave playing.

After repeating each individual step at a slow tempo, first four times, then twice for the sake of accuracy, the figure should finally be practiced in context:

(First, one should practice broken octaves, then simultaneous ones.)
In octave playing, the distance between the third finger and thumb steadily and uniformly decreases as one moves up. This simple observation leads us to consider the reduction in hand stretch as a specific type of movement. If we again consider the thumb as the “leader” of the hand and hold it slightly supinated, the thumb and third finger oppose each other like the jaws of a pair of pliers. In the lower positions, the third finger is still positioned steeply on the string due to the greater distance from the thumb. However, the further the hand moves upwards and the smaller the intervals become, the more the third finger bends, tilting its tip toward the thumb. As long as space permits, the first and second fingers should also be placed on the string to reinforce the third. The fourth finger, when extended, rests fairly firmly against the third finger, acting as a buttress, giving the entire hand greater stability. This makes it easier to overcome the resistance of the strings and also allows for greater accuracy in hitting the intervals.
Another word about arm usage during legato octaves:

Playing octaves rapidly in legato (i.e. with many tones within a bowstroke) bears some analogy to a specific staccato movement of the bow arm. Often, in both types of movement, players excessively increase their tension, resulting in an unnecessary exertion of force from which many surprisingly succeed in executing the passage. However, as shown in the chapter on staccato, one can also approach octave playing according to the law of minimal tension by consciously relaxing the upper arm after each interval during practice, thereby avoiding prolonged exertion.
So-called fingered octaves, which the violinist can learn without particular difficulty, are only possible in the higher registers of the cello, starting at approximately these pitches:
It can be the best fingering for runs like this one:
For a passage like the next one, Trendelenburg provides the fingering above the notes and suggests that such a sequence of notes can be played using the fingered octaves procedure “if significant audible sliding is not to be tolerated.” Well, acoustically, the sliding can easily be avoided if the bow pressure is almost completely removed during each position shift!

This requirement must be met for all double stops in octaves, sixths, thirds, and tenths, especially when slurs are present, as shown in the second example above. With this procedure, the passage quoted by Trendelenburg will sound perfectly good even if there is any sliding.
2. Tenths
Playing tenths on the cello is only possible in the higher positions, approximately from this position upwards, due to the wide stretch it requires.
The best fingering for playing tenths is as indicated above. Passages like the following can sound good if executed with skill:
In contrast to the hand position for octaves, here the middle fingers are not placed on the string but float above the strings.
3. Thirds
Playing scales of thirds evenly and cleanly with alternating fingers in both directions is no easy task for cellists. In addition to the difficulties of intonation and extensions in the lower registers, for example, there is also the coordination of the pairs of fingers: respectively, thumb and second finger, or the first and third fingers.
If ever the clarity and precision of left-hand technique were to depend on the careful separation of movement impulses for fingering and position shifts, it is the case here in scales of thirds.
In addition to observing meticulous intonation, the utmost precision is therefore necessary when moving the hand into the new position.
This movement should be practiced with a sudden impulse. Each of these quick movements, which are accompanied by spontaneous arm motion, must be followed by deliberate relaxation. This is what provides stability for the hand in the new position.
Closer examination of rhythmic and dynamic asymmetries, particularly at rapid tempos, reveals that left-hand instability represents their most common underlying cause—alongside bow control errors. This deficiency very often stems from faulty practice habits, where players habitually attempt to force tempo increases, thereby impairing the natural automaticity of tension and release.
(Naturally, as mentioned earlier, one can also accelerate a movement’s tempo through uncontrolled forcing. This type of acceleration carries something fundamentally unhealthy; it undermines the entire technical foundation and provokes corresponding sensations of tension and strain in the listener.)
Practicing scales in thirds can become a paradigm for correct or incorrect movements. It is incorrect to choose too fast a tempo from the beginning. This prevents us from having the sensation of each individual third imprint itself into our consciousness. Likewise, we must take care to control evenness when we progress from position to position.
For example, note that when playing a sequence of thirds, the arm motion that triggers the position shift from D and F to E and G should not occur too early, i.e. not at the beginning of the shift, but only when we arrive at the new position.
Practicing without making this fine distinction would prove physiologically disadvantageous: when the arm initiates motion even a moment too early—whether unintentionally, automatically, or through anticipating the impending shift—the hand movement would generate increased tension precisely at the shift’s critical moment. The previously described approach proves preferable, where energy reserves convert exclusively into movement.
In summary, this requirement can be distilled into the following formula: play as loosely and relaxedly as possible; avoid tensions that cannot translate into movement except where genuinely appropriate (such as when playing thirds without alternating fingerings or executing legato octaves). When such tensions become necessary, apply them energetically and purposefully initially, then work gradually to reduce them.
This will allow the hand to move into the new position easily, and the movement will retain its external smoothness. (When playing descending thirds, it is important to ensure that the thumb and second finger land correctly in the new position before the first and third fingers come into action. Such passages can be played as follows:

Here, the first and third fingers are held hovering in the spacing corresponding to the intervals about to be played.)
The trill and movements related to the trill
The path to a fine trill—that is, one that is fast and even—comes through diligent study, described below. Slow preliminary exercises are essential. We will first focus on trilling exercises. When practicing a half-step trill between the first and second fingers, the second must be raised quite high so as to strengthen the extensor muscle. The tapping motion is less important, since the flexor tends to be naturally preferred. To exercise all the extensor muscles of the fingers simultaneously and evenly, the third and fourth fingers should also be stretched as far as possible at their base joints, i.e., held high. This also increases the height of the trilling finger. When performing a trill with the first and third fingers over the interval of a whole tone, the second finger should also follow the movement of the third (i.e. the tapping motion). If it does not, and remains stretched rigidly in the air, two opposing tendencies act upon the hand at the moment when the third finger drops on the string. This may not concern some players who play with excessive muscular tension, but for developing an optimally functioning movement system the distinctions are important. From this, one can derive the rule that when trilling with two fingers, there should be as few opposing tension tendencies as possible between the stationary finger and the trilling finger. Therefore, if it is the first finger that is stationary and the third that trills, the second finger should not be outstretched; it should follow the movement of the third finger.
Further, we also foster this coordination through regular trill practice in which the second finger accompanies the movement of the third. This greatly promotes the stability of the hand and simplifies technique. When playing a sequence of notes like the following one, the second finger must be placed with the third finger; this way, we can play C simply by lifting the third finger, otherwise the second finger would have to drop on the string first, which would require an additional movement.
This fact is extremely important, especially in rapid passages. Unnecessary lifting of fingers should be avoided wherever possible.
Note that when trilling between the second and fourth fingers, the third may move along with the fourth in order to balance the movement; however, it should neither be placed down nor stretched out. The accompanying movement of the third finger makes the work of the fourth finger easier. However, one should be careful not to drop the former on the string, as it would arrive to early due to its length.
The C-string presents a special challenge for the trill, as strong finger action can produce extraneous noise. We can avoid this by changing the part of the finger that contacts the string, namely by trilling with the pad rather than the tip of the finger. Similarly, the tremolo in first movement of Brahms’s Sonata in F major should be handled carefully:
Here, you can let both the middle fingers move with the fourth finger. (See image 78 in the Appendix.)
The trill between the second and third fingers uses the same procedure as the trill between the first and second. The trill movement between the third and fourth fingers is somewhat different. Here, the inequality between the fingers is particularly noticeable, and can rarely be remedied and only with persistent training. For even if the function of the whole hand improves in the course of study, there remains a certain inferior function in the fourth finger, and often the third finger too, in comparison to the first two fingers. Anyone who would conclude from this that they can completely neglect the fourth finger not only has to compensate for the reduced function of this finger, but could actually consider themselves to be in possession of a hand with only four fingers! The disharmony of function is due to the natural harmony of the hand’s structure. Goethe, in his physiological-anatomical studies, advises actors to note that in the naturally formed hand, this asymmetry in anatomical structure has a special aesthetic charm: after all, a hand with four equally long and strong fingers would appear less graceful. Since humans do not seem predestined by nature for playing the cello, they must correct their natural disposition and strive for equality of the fingers, just as they perfect their bowing, developing from an apparently “natural” (that is, often clumsy) movement to achieve something artistically purposeful. The benefits of a well-trained fourth finger can be seen when playing or listening to the last movement of Brahms’s Sextet in B-flat major. We seldom hear these measures from the main theme played flawlessly on the cello.

Here, the player—because of the grace notes after each trill—is compelled to use the above fingering; any other would be even more disastrous… Those who can trill smoothly with the fourth finger here will interpret this charming theme with ease and grace. Without the fourth finger, a sequence of trills like the following would be absolutely impossible:

A few more words about the joint activity of the fingers when trilling: careful observation indicates that the hinge joints of the fingers are only slightly involved in comparison to the base joints. It is in these base joints that we find the main pivot point for each individual finger. This is essential for identifying the causes of movement inhibitions, even when performing other technical tasks (e.g. scales, fast passages, etc.).
Let us take a closer look at the causes of so-called inhibition. Every player knows from experience what the concept means: i.e., the noticeable resistance that opposes a desired movement. This can (especially in small or narrow hands) mean a difficulty in rotation, or in spreading the fingers, or an obstruction of movement when trying to spread the fingers. When this happens, the player expends so much energy to stretch the fingers (for example, in the lower octave of the D major scale) that their movement becomes awkward and unrhythmic.
We must not forget that both the movement itself and the state of spreading can be made possible through uniform muscle actions: movement through tension and relaxation of muscles, spreading through the retention of muscles with a certain degree of tension.
It comes down to the overall concept of energy. If the hand is sufficiently stretchable, it requires less effort to play fluently over wide intervals than if extensions can only be achieved with the help of greater active effort. Every instrumental musician instinctively feels this, and strives not only to adapt their hand to the intervals on the instrument through various types of exercises, but also to be able to play comfortably in extended positions. (We have already shown how such stretches can be facilitated through exercises away from the cello.) These would be anatomical inhibitions. But there is another type of inhibition, namely the hindrances caused by mechanical issues with the joints, tendon sheaths, sometimes in the muscles, and finally the impulse inhibitions based on nervous disorders.
It is beyond the scope of this work to mention all the possible pathological conditions that can cause mechanical interference in cello playing. Regarding “borderline” conditions, we should mention that rheumatic disorders (which often go unnoticed in certain predisposed individuals) can cause extensive restrictions of movement and pain. Over time, these disorders can lead to nerve damage. Such severe conditions can escalate to the extent that they jeopardize the ability to function professionally.
When we think about what makes playing difficult, there are forces working against us from outside our bodies—like gravity pulling down on our arms and hands, and the stiffness of the strings themselves pushing back against our fingers. These are external obstacles to our movements. But we should also recognize that the physical limitations we described earlier are internal obstacles—things happening inside our bodies that resist movement. Along with these internal factors, there’s also the natural friction that occurs between the tissues in our body, which can never be completely eliminated. Then there are the restrictions on how far our joints can move, caused by tight bands of tissue that wrap around and support our joints.
We can get a sense of how joint friction affects your playing by trying this simple experiment: completely relax the left hand and gently pull the fingers back and forth at the base joints (where the fingers connect to the hand) with quick, small movements. After just a few minutes, we notice that the individual fingers move more freely and easily. (However, be careful not to rely on this kind of exercise by itself. These techniques are only valuable when they’re part of a complete physical training program that’s carefully designed for your individual needs and characteristics.) In this way, we can best reduce the external resistance explained above. (Avoid excessive downwards pressure of the strings when playing rapidly. Remember: relaxation!)
In addition to these mechanical-anatomical constraints, physiological-functional constraints also take place in the process of movement. Every movement is executed in a purposeful manner, with muscle groups tensing and relaxing in a specific, orderly sequence, interacting with each other. The orderly execution of movement is called coordination. From the wealth of physiological facts, let us highlight the most important:
When you move your forearm, for example, not only do the muscle groups that directly cause the bending come into action, but also those that cause the opposite movement—the stretching. These are called the antagonists. Although their action occurs in a somewhat weakened form, they are still able to control the movement through their tension and slow it down.
You can recognize the importance of this muscle mechanism by observing people with nerve disorders. In these cases, the inhibitions are eliminated, making their movements uncontrolled, jerky and exhausting (ataxia).
Now, in left-hand finger technique, good playing differs from bad playing in that with good technique, the control is achieved by antagonist muscles under minimal tension, so that the energy expenditure is kept appropriately low, while at the same time the necessary controlled movement is maintained under the strongest tension of both types of muscles. However, better tone production is by no means achieved this way, since only the surplus of the currently dominating muscle energies converts into pressure or pulling. Tense movement is uneconomical and impairs overall technique. Above all, it disturbs the rhythmic flow of playing movements. In particular, the the cramped positioning of the arm or hand leads to rhythmic disruptions!
From all these discussions, the student can learn that in the course of their studies, they must train extensively in relaxation, and that where playing becomes unrhythmic or unbalanced, they should independently analyze their movements at a reduced tempo, eliminating tensions partly through special exercises, partly through modifying their practice routine.
For the teacher, however, it is advisable not only to observe the student’s external movement patterns, but also the processes in the student’s playing apparatus. The teacher should sometimes feel the student’s arm, for example, to detect excessive tensions.
The speed of trill movement can also be increased by gradually reducing the height of the trilling finger above the string, and also by not pressing the string down completely. In certain cases, this saves energy.
As an example, let me mention a substitute for the true trill: the arm is placed on the designated finger in an artificially cramped state; through rapid up-and-down movements of the forearm in sixteenth-note rhythm, the finger is now pressed firmly against the string in alternation and then released from it. This creates an “arm trill,” which usually doesn’t sound as clear as the true one, although it is admittedly an acceptable substitute in some situations. There are people with a predisposition for trill movements and others who, even with a lot of practice, never really succeed in achieving the rapid, elastic change of movement necessary to achieve the ideal trill (although they are well equipped in many other respects). By the same token, there are also musicians predisposed towards “shaking” movements of the bow, who find staccato very easy; others, who can produce the most subtle shadings in their tone production through the finest gradations of muscle action, lack the rapid, abrupt movement changes needed to play staccato.
Nevertheless, experience shows that someone who can play an excellent trill generally possesses skill in virtuoso technique. Such players seldom have to use the “substitute trill”—it is, and always will be, just a substitute for the classic finger trill. However, a substitute trill can only be used habitually without harm if it is absolutely necessary to do so—otherwise it inevitably leads to a deterioration of skill at the true trill.
Sixths
Playing sixths is an important measure of our approach to playing. Playing sequences of double stops in sixths with complete purity of intonation is only possible through physiologically correct hand and arm positioning. (See Figures 68 and 72 of the Appendix.)

Here is how to proceed. Begin with the following exercise in fourth position, which makes no great stretching demands on the hands, and is also supported by the contact point on the neck of the instrument. (See image 13 of the Appendix.)
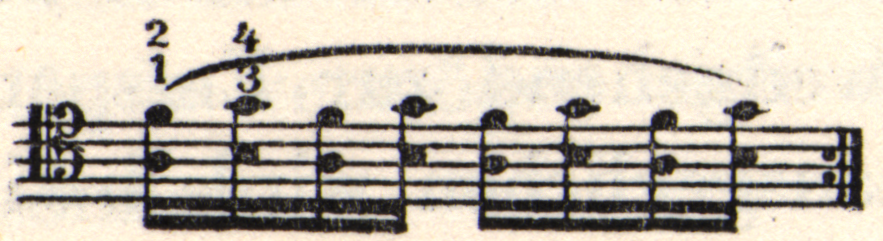
Now play the same exercise in first position.

After this, connect both positions in these two different ways:

The fingers are placed in a curved position; the thumb (depending on hand size) touches the cello neck with its tip; the forearm and the back of the hand are positioned approximately in the same plane. This determines how high the elbow and arm should be.
When shifting from fourth to first position and vice versa, the movement should be restricted to just what is absolutely necessary. The elbow stays at the same level, the hand maintains the same configuration.
The motor process for executing the above exercise is limited to a simple back-and-forth forearm movement (beyond lifting the third and fourth fingers, while the first and second remain on the strings). By keeping the first and second fingers on the strings, the movement’s directional tendency finds clear expression.
When playing the following passage, the player must unavoidably place the finger steeply on the C-string, just as we would on the A-string. So that we create the same arm-to-string relationship, the upper arm must be positioned quite high.

On double stops in general, and on chords
For a series of double stops, the most varied stretches and hand positions come into play. For double stops where one lower string is combined with finger placement on a higher string, the customary way to place the fingers (all joints evenly curved, the tip of the first, second, and sometimes also the third finger placed perpendicularly on the string) is a great advantage.
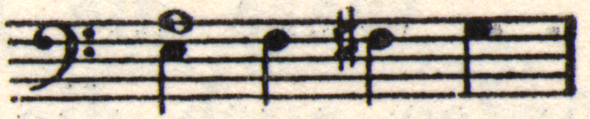
Likewise, with chords such as those in the two following examples:
![]()
If the first or second finger covers two or three strings, in fifths or in chords, then the hand should automatically be set in the first or second configuration, for example:
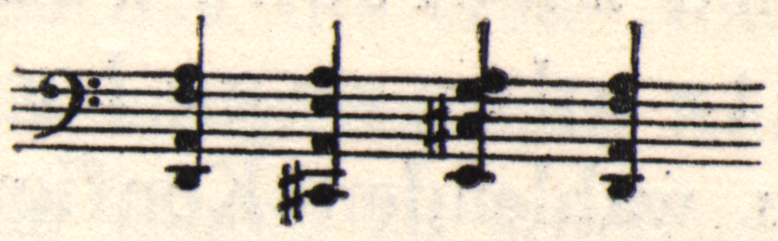
With certain chords and double stops, we must go to the limit of the second hand configuration (see also image 79 of the Appendix):
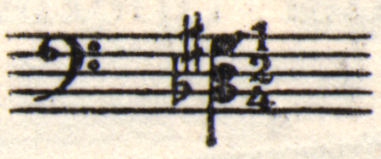
Normal hands cannot stretch this chord (which comes from the third movement of Becker’s Waldschrat Suite) any other way than that shown in image 79 of the Appendix (this is similar to Trendelenburg’s concept of the “hanging hand”).
This chord (from the conclusion of the Prelude to Bach’s Suite in C major), where we must utilize the stretching ability of the second finger, is shown in image 80 of the Appendix:
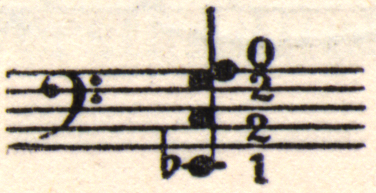
Here, the whole arm moves forward, including the shoulder. The thumb moves far out, so that it only touches the neck of the cello with its tip.
If we were to play the fifth (C-G) with the third finger, this is obviously impractical because of the likelihood of touching the A-string. Using the second finger for the fifth, however, makes it possible to lift the hand higher. This avoids the danger of touching the A-string. Image 81 of the Appendix demonstrates the first finger’s stretching ability through the following passage:

- Becker writes er meistens zu tief greift, literally "reaches too deeply." ↵
- Becker uses the word Antagonismus, i.e. "antagonism," in its scientific sense. Antagonistic muscle action is the coordinated interplay between opposing muscle groups. Antagonistic muscles work in pairs, meaning that when one muscle contracts (the agonist), its opposing muscle (the antagonist) must relax in a coordinated way to allow for movement. ↵
- Becker's note: "Until now, the terms Position and Lage were identical." Translator's note: this paragraph explains the difference between the German words Position and Lage. Confusingly for English speakers, both can be translated as "position." Here, Becker uses Position to describe hand position, i.e. the shape of the hand in relation to notated intervals, and Lage in the sense of the hand's location of the hand on the fingerboard (for example, erste Lage translates as "first position"). ↵
- i.e. extended position. Becker uses the term weite Position, literally "wide position." ↵
- i.e. I. Lage ↵
- Becker's note: The principle of allowing the left hand to assume a relaxed, natural position, from which the basic or normal finger position results, is nothing new. No less a figure than Paganini advocated it! In an interesting text based on Paganini’s teachings by the violin pedagogue Albert Jarosy, The Fundamentals of Violin Fingering, worth reading for more than just violinists, the author attempts to demonstrate from Paganini's own words that his fabulous left-hand technique, which seemed to be based on a secret, stemmed in no small part from recognizing and following the "natural finger position."
Jarosy writes (on page 18 of his treatise): "What do we know about Paganini's secret? Professor J. M. Schottky, his Prague friend and biographer, provides the basis for our research in the following note:
'Very often, in his conversations with me, Paganini returned to the idea that one day, after he had completed his travels and had retired, as it were, to peace, he wanted to impart to the world a musical secret that could not be learned in any music conservatory, and through whose possession a young person could then fully develop himself within a period of three years at the most, whereas otherwise it would take perhaps ten years.
My secret, if I may call it that, should show violinists a way to understand the nature of the instrument better than has been done so far, and which reveals itself to be far richer than is commonly assumed. I owe this discovery not to chance, but to serious study, the application of which will no longer require four to five hours of daily practice. It must replace the current teaching method, which seems to be more concerned with making things difficult than with teaching. But it must be declared a mistake if one wants to find this secret, the execution of which requires intellect, only in my violin tuning or perhaps in the bow.
If it was Paganini's endeavor to avoid tension wherever possible and to base his fingering on the "natural fall of the fingers," then those who believed they could further develop cello technique through methods that contradict the natural structure of the hand and the characteristics of the instrument are in diametric opposition to the approach of the greatest "technician" of all time.
The insight of this incomparable genius recognized the unavoidable necessity to "first understand the nature of the instrument" and, based on this understanding, to develop a teaching method that fosters a natural playing style corresponding to the character of the instrument. While this requirement represents an irrefutable principle of universal validity for the violin, it applies even more so to bowed string instruments whose spatial extension is greater than that of the violin!
In cello practice, the fingering system replaced by J. L. Duport's codification of modern fingering should not be reinstated, as some cellists seem to be attempting, because it would be detrimental to intonation (see the footnote in "Overview of the Evolution in the Art of Cello Playing").
 On the D-string, in the case mentioned, it might work because there is only a half-step from the second to the third finger (F-sharp to G). However, expecting the third finger to stretch a whole step in wide positions undoubtedly increases the difficulty. Why? It is easy to understand: the ring finger is limited in its movement, affected by the tight ligament connections with the middle and little fingers, which impairs its ability to stretch.
The third finger's stretching ability is impaired because it follows the movements of the middle and little fingers, connected by tight ligaments. Therefore, over the interval of a whole step, the second finger is often omitted from use.
For the purpose of training, in the sense of any other stretching exercise, such fingerings may at least be used; every thinking artist uses them for aesthetic reasons, especially in the cantilena, for example, to avoid disturbing the homogeneity of the sound with an open string. (See the section of this book on the handling of open strings.)
Let us not forget, however, that achieving perfect intonation depends primarily on clearly recognizing the proper natural position of each finger (see the treatises on intonation and the position of the left hand), which allows for a natural fingering without difficulty. However, fluency would also suffer from such unnatural fingerings. In this example (from the introductory figure to Waldräumen from Hugo Becker's Waldschrat Suite), try rapid legato scales or even a run like the following at the required fast tempo:
On the D-string, in the case mentioned, it might work because there is only a half-step from the second to the third finger (F-sharp to G). However, expecting the third finger to stretch a whole step in wide positions undoubtedly increases the difficulty. Why? It is easy to understand: the ring finger is limited in its movement, affected by the tight ligament connections with the middle and little fingers, which impairs its ability to stretch.
The third finger's stretching ability is impaired because it follows the movements of the middle and little fingers, connected by tight ligaments. Therefore, over the interval of a whole step, the second finger is often omitted from use.
For the purpose of training, in the sense of any other stretching exercise, such fingerings may at least be used; every thinking artist uses them for aesthetic reasons, especially in the cantilena, for example, to avoid disturbing the homogeneity of the sound with an open string. (See the section of this book on the handling of open strings.)
Let us not forget, however, that achieving perfect intonation depends primarily on clearly recognizing the proper natural position of each finger (see the treatises on intonation and the position of the left hand), which allows for a natural fingering without difficulty. However, fluency would also suffer from such unnatural fingerings. In this example (from the introductory figure to Waldräumen from Hugo Becker's Waldschrat Suite), try rapid legato scales or even a run like the following at the required fast tempo:
 Neither purity nor rhythmic equality can be achieved in this context. Admittedly, the demands generally placed on purity and regularity in cello playing are, alas, not very high! To achieve peak performance, however, one must strive for perfection. Let us hear what Jarosy further says about Paganini's teachings. We read on page 112 of his text:
"The violinist, who has become aware of the natural fingering, the altered perception of register, etc., will now be able to correct his playing independently. This is considerably less effortful than one might assume. The surprising speed with which he is able to use a new approach, despite it being in complete contrast to that often used for many years, shows that this is a matter of liberation from an unnecessary constraint. Only in this sense can Paganini's words about the cellist Gaetano Giandelli, the only musician with whom he shared his secret, be understood.
'He had been playing the cello for some time in a most mediocre manner, so that his playing was considered commonplace and rightly went unnoticed. However, since I was interested in the young man and wanted to favor him, I acquainted him with my discovery, which had such a beneficial effect on him that within three days he became a completely different person.'
We can interpret this miracle. The young artist was suddenly freed from the numerous inhibitions of his left hand and could devote his undivided attention to bow control, that is, to a soulful performance.
The fear of incorrect intonation disappeared as soon as the fingers began to work freely; reason enough to completely transform Giandelli's playing."
(Giandelli thus seems to have remained unaffected by J. L. Duport's reform. See the remark on the second page of the overview of the evolution in the art of cello playing!)
It's not without irony that Paganini sought to simplify his violin technique by applying a fingering that is specific to the lower registers of the cello; whereas some contemporary cellists believed they had to import techniques that already proved inhibiting to violin playing to the even larger cello! The view of such supposed pioneers now seems downright grotesque, however, when one considers that instead of the fingering principle modernized by Duport, they resort to one dating back to a time when cello playing was still in its infancy.
If anything had changed since Duport's reform—for example, if the human hand had become larger or the cello's proportions had become smaller—one could understand why a new approach would have to be created to accommodate these changed circumstances. However, this is not the case; the hand and scale have remained the same. Therefore, if nothing has changed, it is logical that we must adhere to Duport's principles as the basis of our systematic approach to fingering. For aesthetic reasons, mind you, every outstanding player applies certain extensions and freedoms to some extend for the sake of better phrasing and greater equality between registers. Such modifications, however, will remain the exception; if they were made a rule, they would so disrupt the well-established foundations of the system that freedom could turn into anarchy. See also Trendelenburg's Foundations, p. 225, "Fingering." ↵
Neither purity nor rhythmic equality can be achieved in this context. Admittedly, the demands generally placed on purity and regularity in cello playing are, alas, not very high! To achieve peak performance, however, one must strive for perfection. Let us hear what Jarosy further says about Paganini's teachings. We read on page 112 of his text:
"The violinist, who has become aware of the natural fingering, the altered perception of register, etc., will now be able to correct his playing independently. This is considerably less effortful than one might assume. The surprising speed with which he is able to use a new approach, despite it being in complete contrast to that often used for many years, shows that this is a matter of liberation from an unnecessary constraint. Only in this sense can Paganini's words about the cellist Gaetano Giandelli, the only musician with whom he shared his secret, be understood.
'He had been playing the cello for some time in a most mediocre manner, so that his playing was considered commonplace and rightly went unnoticed. However, since I was interested in the young man and wanted to favor him, I acquainted him with my discovery, which had such a beneficial effect on him that within three days he became a completely different person.'
We can interpret this miracle. The young artist was suddenly freed from the numerous inhibitions of his left hand and could devote his undivided attention to bow control, that is, to a soulful performance.
The fear of incorrect intonation disappeared as soon as the fingers began to work freely; reason enough to completely transform Giandelli's playing."
(Giandelli thus seems to have remained unaffected by J. L. Duport's reform. See the remark on the second page of the overview of the evolution in the art of cello playing!)
It's not without irony that Paganini sought to simplify his violin technique by applying a fingering that is specific to the lower registers of the cello; whereas some contemporary cellists believed they had to import techniques that already proved inhibiting to violin playing to the even larger cello! The view of such supposed pioneers now seems downright grotesque, however, when one considers that instead of the fingering principle modernized by Duport, they resort to one dating back to a time when cello playing was still in its infancy.
If anything had changed since Duport's reform—for example, if the human hand had become larger or the cello's proportions had become smaller—one could understand why a new approach would have to be created to accommodate these changed circumstances. However, this is not the case; the hand and scale have remained the same. Therefore, if nothing has changed, it is logical that we must adhere to Duport's principles as the basis of our systematic approach to fingering. For aesthetic reasons, mind you, every outstanding player applies certain extensions and freedoms to some extend for the sake of better phrasing and greater equality between registers. Such modifications, however, will remain the exception; if they were made a rule, they would so disrupt the well-established foundations of the system that freedom could turn into anarchy. See also Trendelenburg's Foundations, p. 225, "Fingering." ↵ - Translation of terms within examples: u.s.w. = et cetera; oder = or. ↵
- Bernhard Cossmann (1822-1910), Studies for Developing Agility, Strength of Fingers, and Purity of Intonation for Cello (ca. 1876). ↵
- Becker's note: "The vibrato mechanism of the violinist is different from that of the cellist and therefore cannot serve as a model for the latter." ↵
- Becker's note: "Such players use a kind of trembling vibrato, which can be performed almost without forearm rotation, instead of a free, pendulum-like vibrato." ↵
